Github Actions self-hosted runner on Azure
Brendan Thompson • 10 September 2021 • 11 min read
This guide will take you through steps to deploying a self-hosted Github Actions runner on Azure, using our favorite infrastructure-as-code tool Terraform. Github actions are progressively becoming more and more popular, especially after Travis CI's pricing change. And, to be honest, I think it is an extremely compelling product. Doing CI/CD with Github Actions (GHA) is very straightforward, and easy to use. Another bonus is that the documentation is pretty decent, for the most part.
If you're coming from more enterprisey environments where Jenkins or Azure DevOps
are more widely adopted it might take a little bit of time to adapt to the yaml and Docker
model used by GHA. But, once you've learnt it, there's no going back!
One thing to note before we get started on this journey is that you can configure Github Actions runners (GHARs) at three levels within Github:
- Github Enterprise - runners are scoped to all organisations within the enterprise, or selected organisations
- Github Organisation - runners can be scoped to all repositories within the organisation, or just to select ones
- Github Repository – the runner is scoped to a single repository
The first two options above the scoping is done via the use of self-hosted runner groups and as the third option is done within a repository itself there is no need for any groups to scope it.
For this post we will however be looking at the second option where we will have a runner group in a Github organisation that is scoped to a repository.
If you have stumbled upon this post and are not familiar with Github Actions, or its runners let me give you a quick run down.
Github Actions is Github's answer to CI/CD, it allows consumers to build their software
solutions, run unit and integration tests, as well as deploy any resulting artifacts to
myriad of hosting services. All of this using a simple yaml based configuration
language for the workflow files. The steps within a workflow use what Github calls actions, these
actions can be JavaScript action, a Docker container action or
composite actions.
In summary; a repository can have many workflows and those workflows can have many steps, each one of those steps is an action. A workflow can also use the same action multiple times in different steps.
The runners (what we are talking about in this post) is where the workflows (and the steps) are executed. There are two options for this, the default hosted runners and the self-hosted runners.
- User Repository - requires
Owneron the repository - Organisation - requires
Owneron the organisation - Organisation Repository - requires
Owneron the organisation, orAdminon the repository - Enterprise Account - requires
Owneron the enterprise
Runner Group Setup#
The first thing we need to do is setup the runner group within our organisation. This group will allow us to group runners together and scope them either to specific repositories, or to all. Another reason one might utilise a runner group is to demarcate between different environments, or builder types. For instance, you might have a runner group for Windows builds, another for Linux, and one for macOS. This demarcation can also be done using labels, which is also very powerful.
While I don't go into much detail about labels with Github runners I would recommend reading up on them as they're extremely helpful when you're trying to segregate roles or functions. You can read about them here.
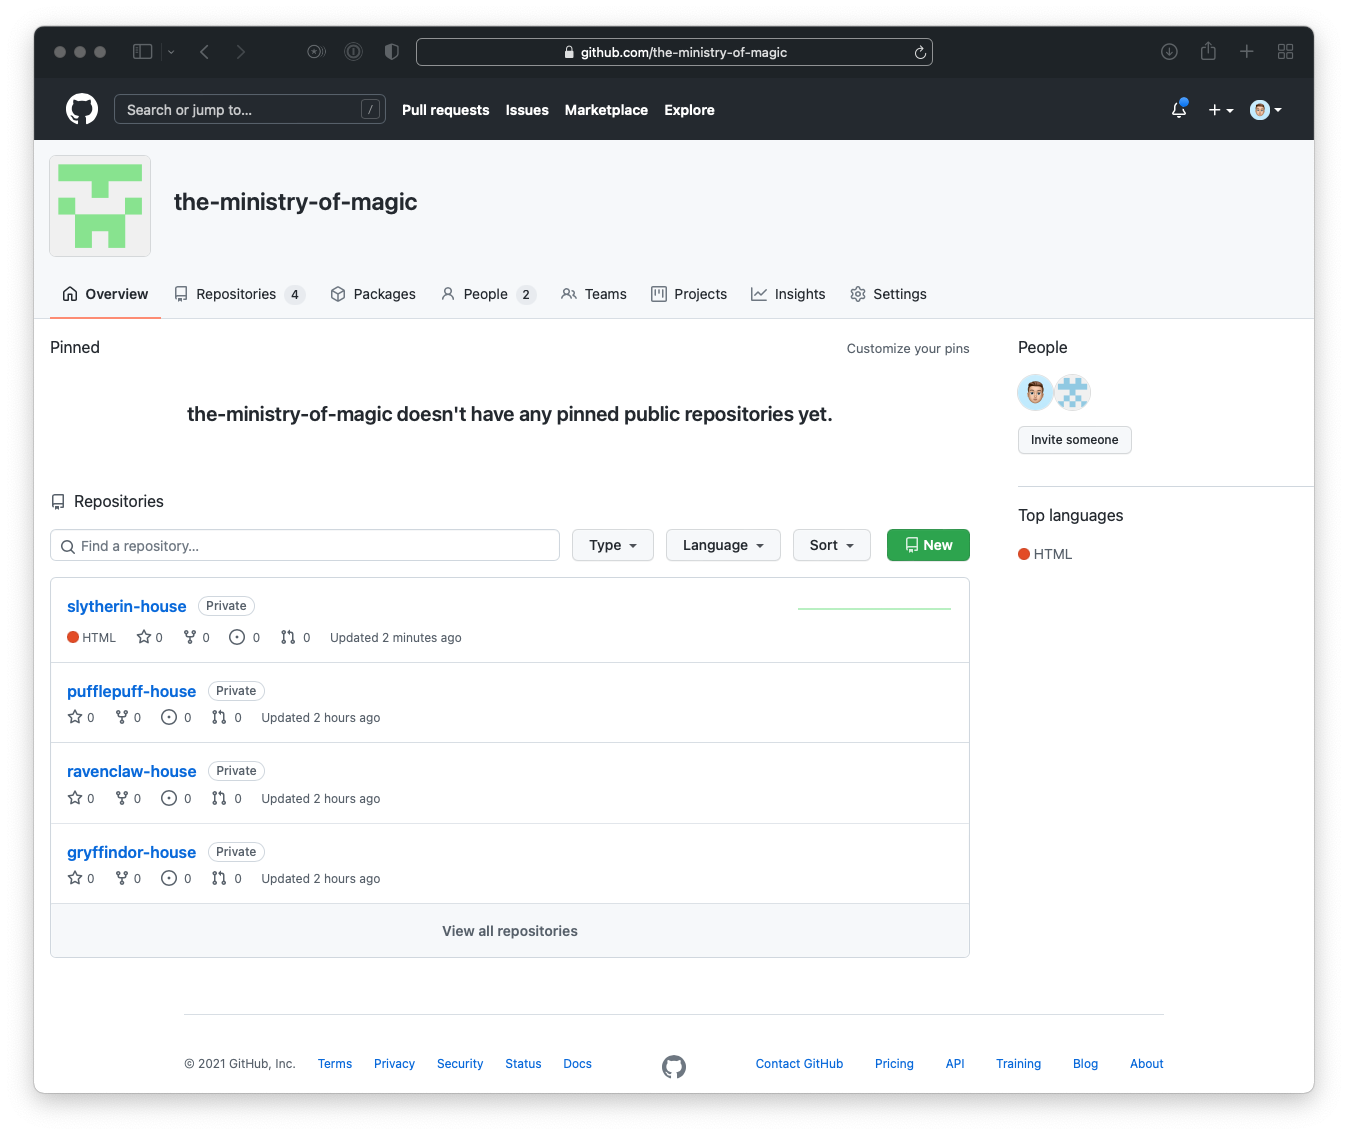
- Head over to your Organisations Profile.
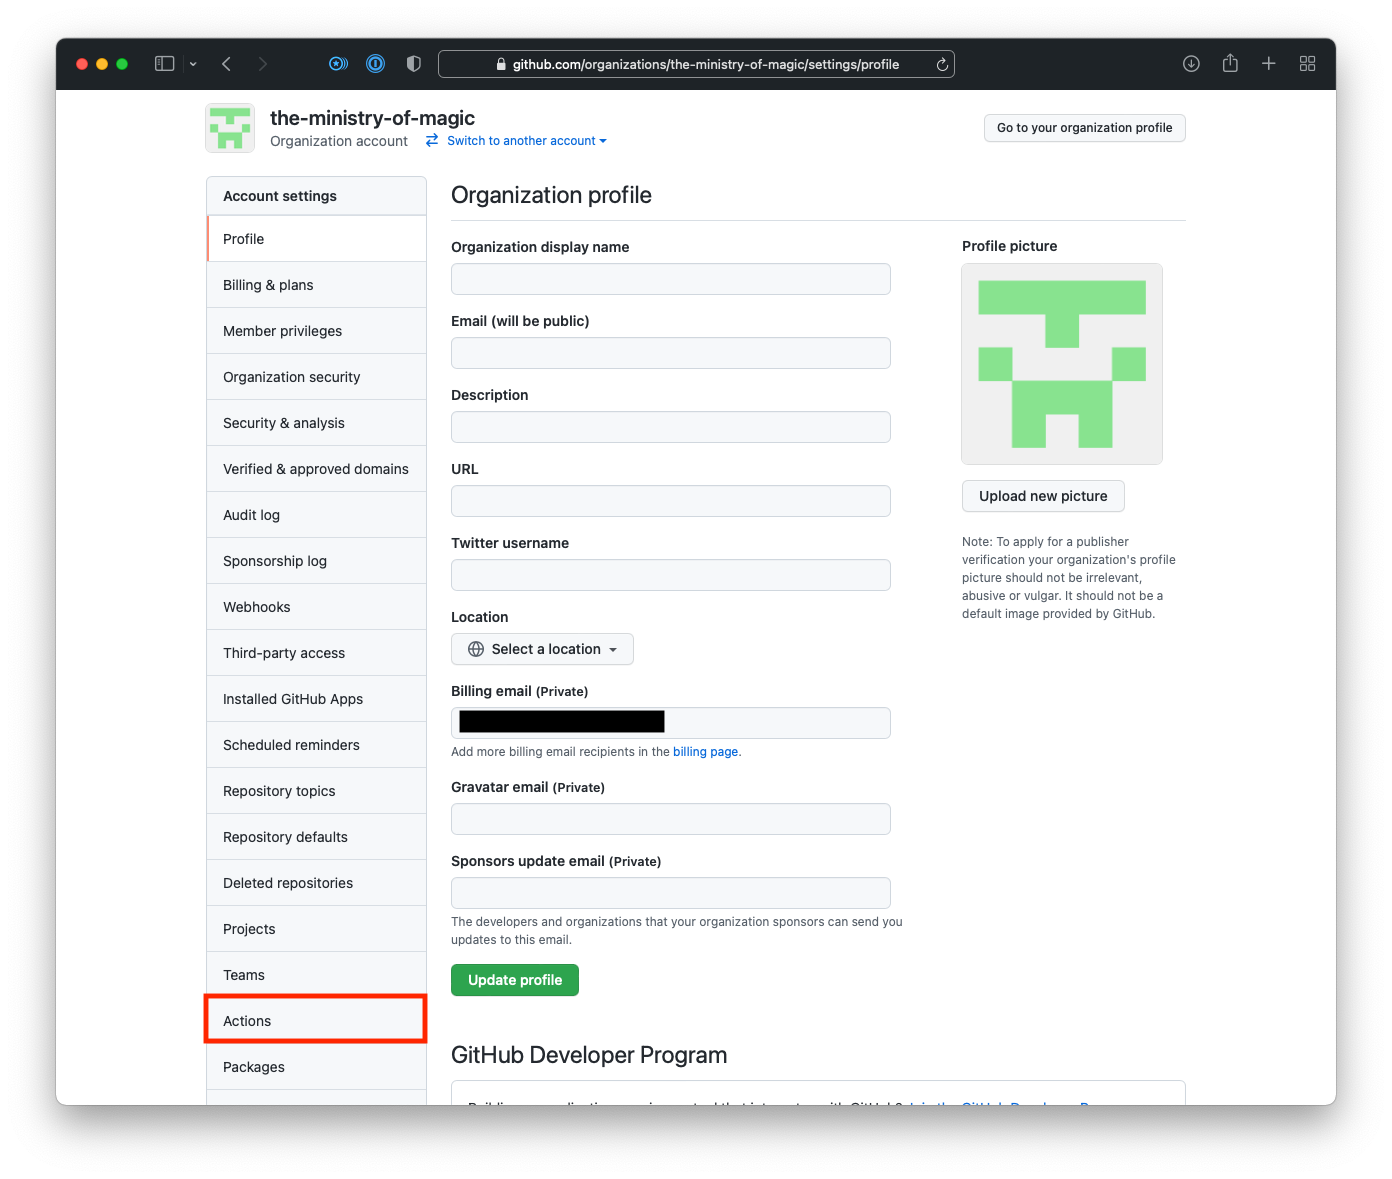
- Click on the Settings tab in the top right.
- Click on Actions in the left sidebar.
- In the Actions sub-menu click on Runners.

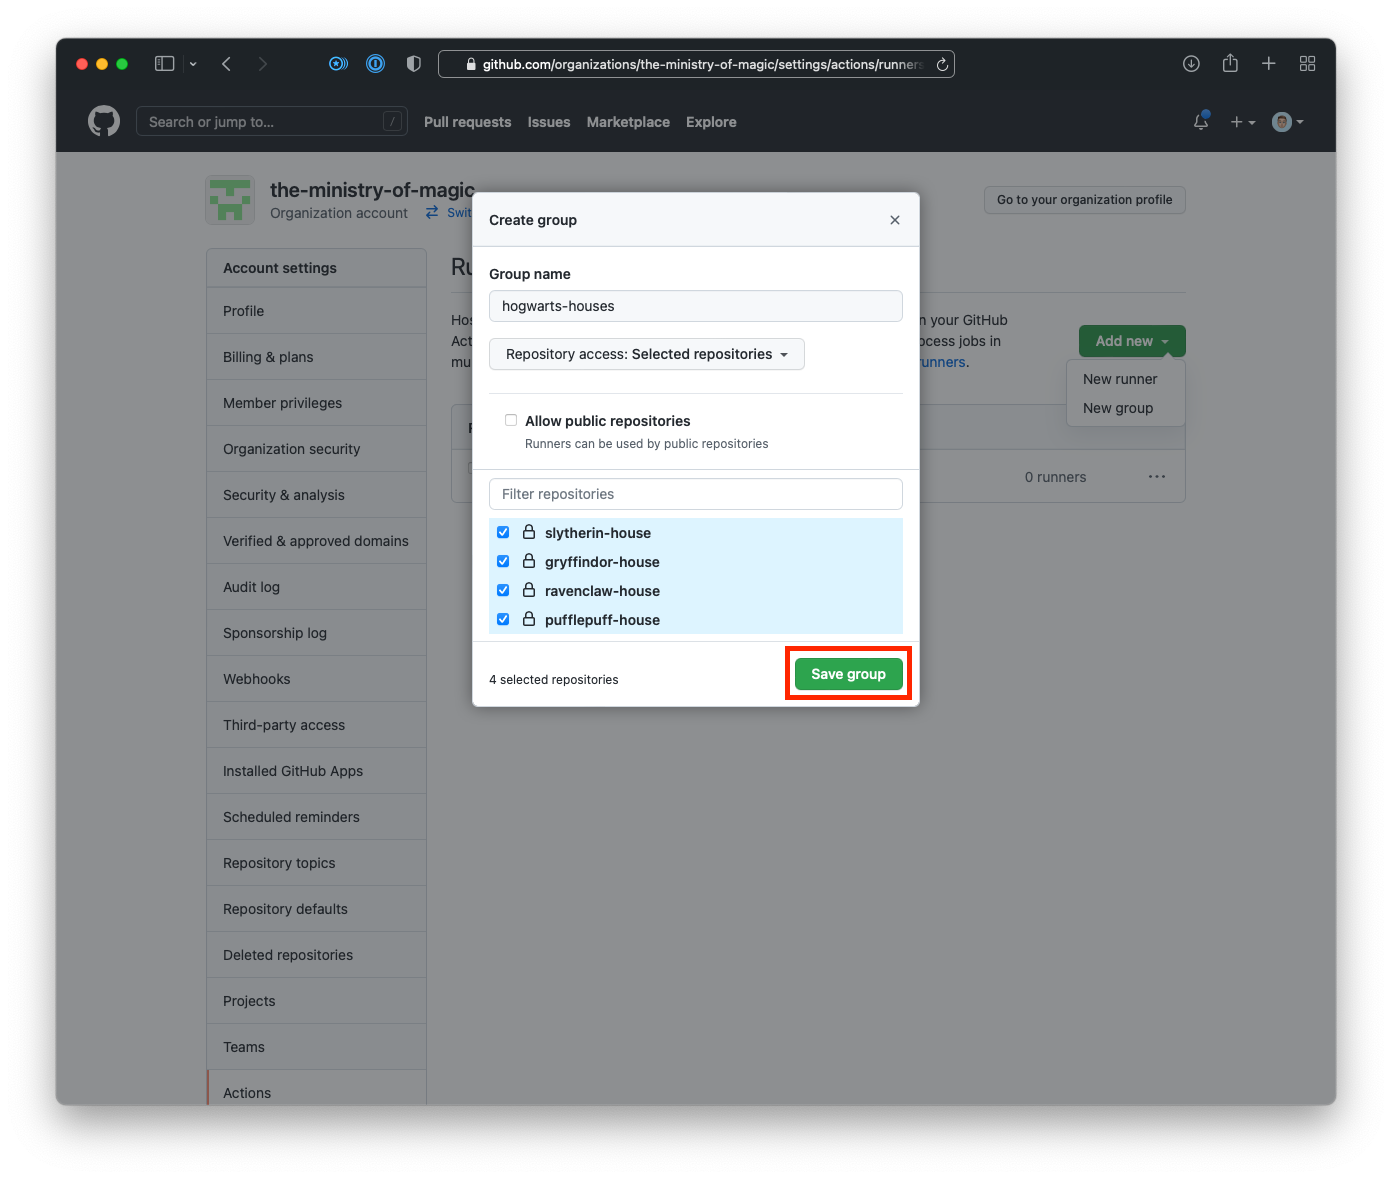
- Click on Add new button, then click New group.
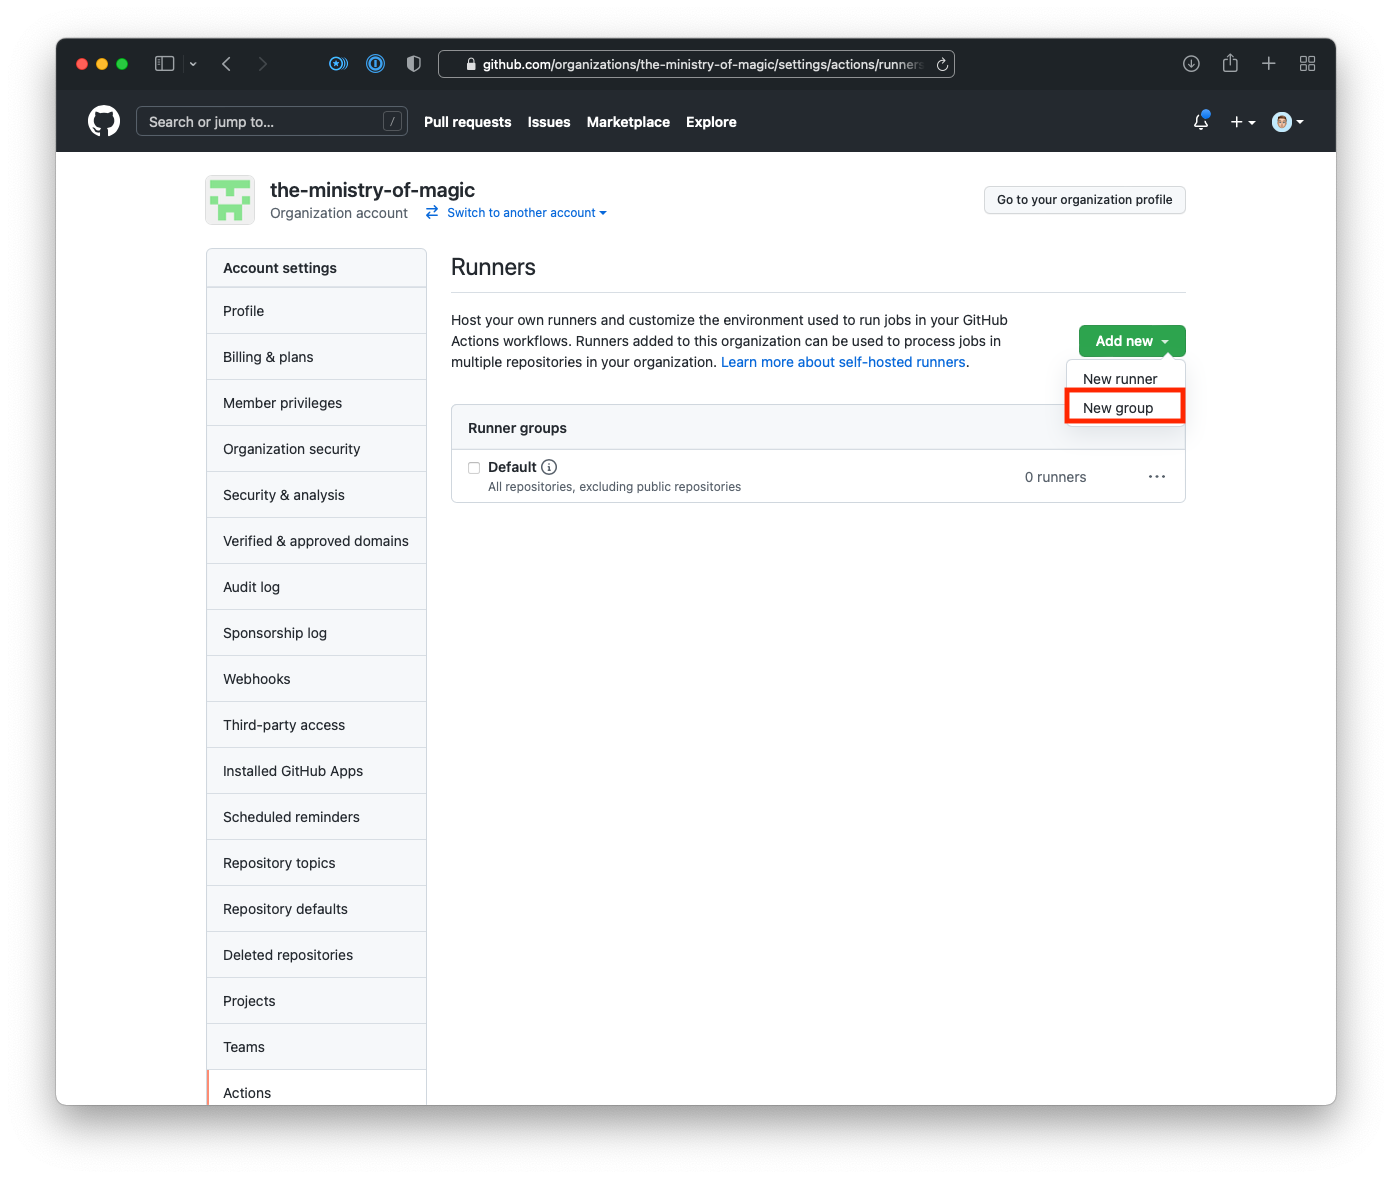
- Enter a name for your runner group, select the relevant repositories, and click Save group.
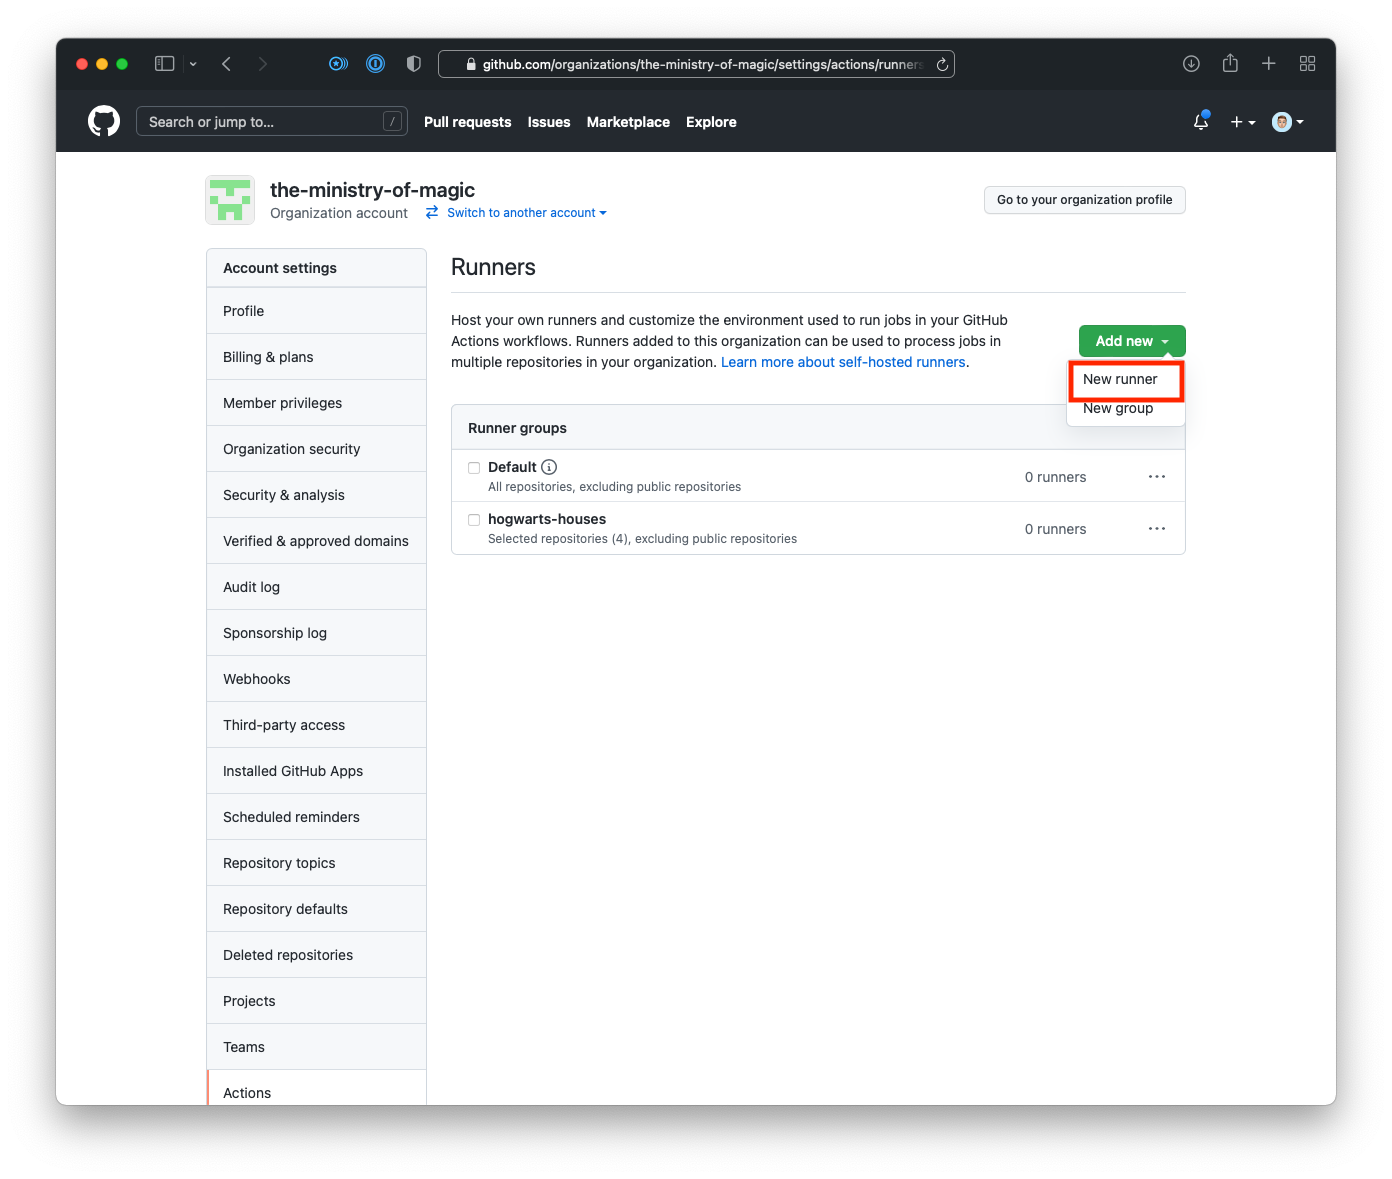
- From the Runners page within your organisations settings click on Add new, and then
New runner.
- On the Create self-hosted runner page in the Configure section we will need to copy out the
registration token. I have blacked it out in the screenshot below.
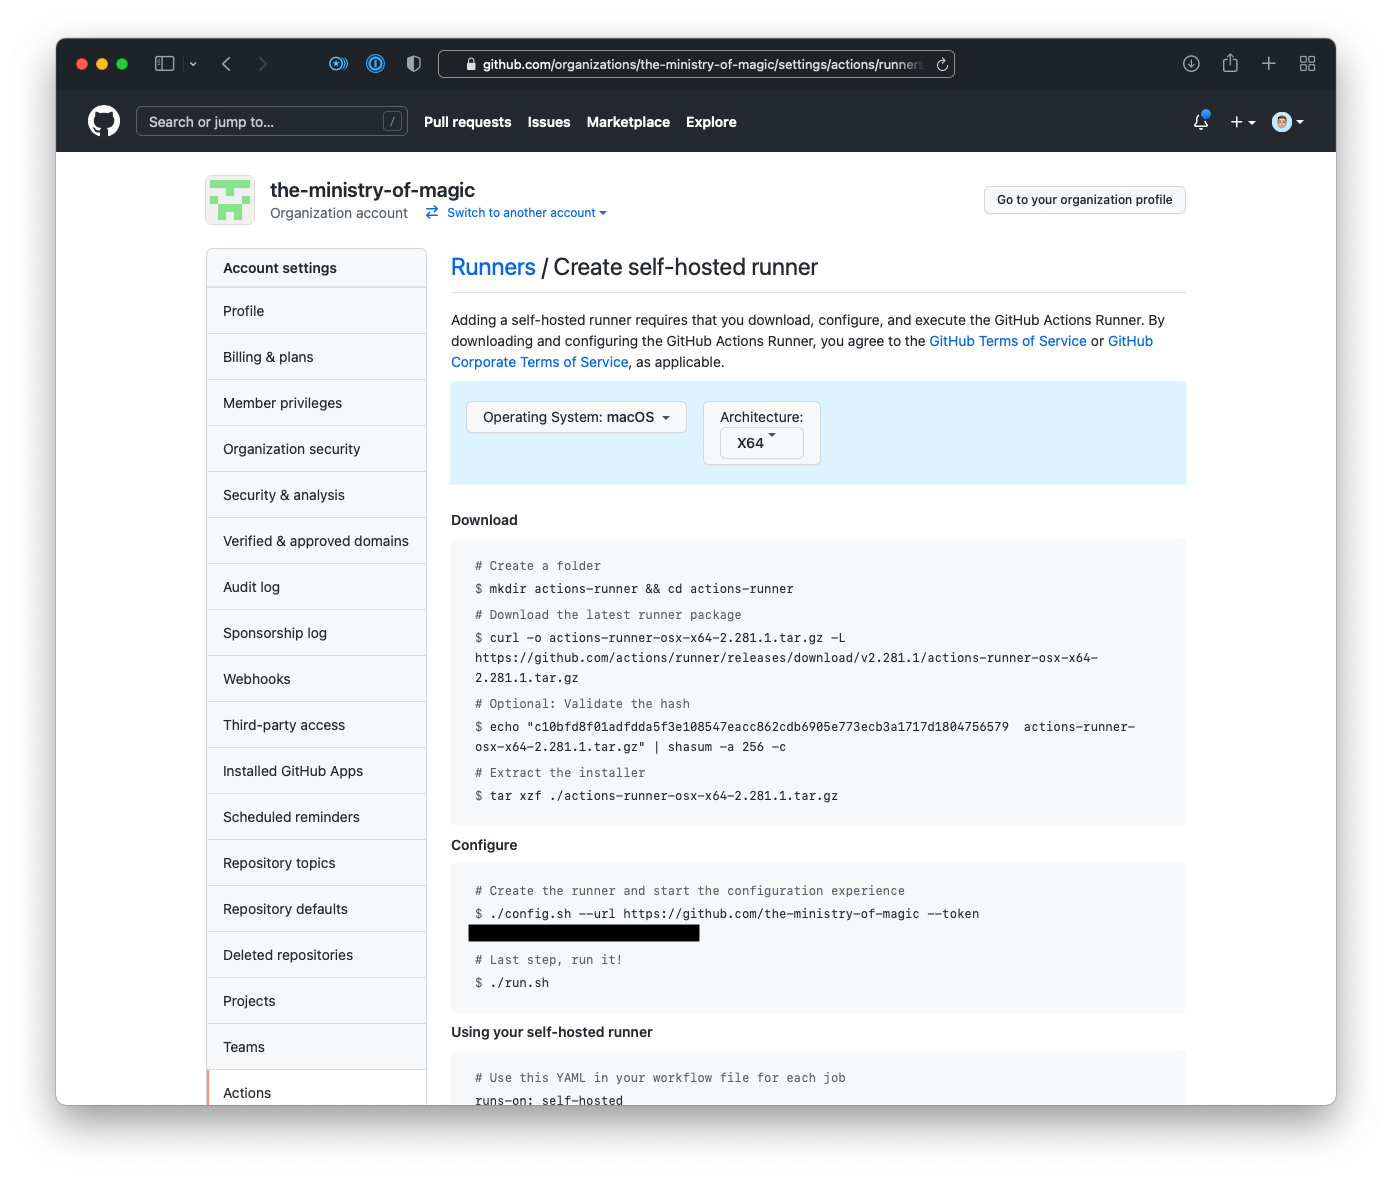 Important!It is very important to note that this registration token only lasts for 60-minutes. After that time has elapsed you will need to regenerate the token either via the API or by going through the process of creating a new runner.
Now that we have the runner group created, and assigned to the repositories we want to work on we can start on setting up the runner itself using Terraform.
Provision the Runner#
This Terraform code will take a pretty standard approach from a file and layout perspective, below I have outlined the files that will need to be created.
.
├── README.md
├── main.tf
├── providers.tf
├── variables.tf
└── versions.tf
Providers#
The providers.tf will contain any configuration required in order to make the provider function.
In this instance I am only statically putting in the subscription_id everything else will be
passed into the provider via environment variables.
provider "azurerm" {
  features {}

  subscription_id = "0000-0000-0000-0000-000000000000"
}
Versions#
versions.tf is a little more exciting than providers.tf, at least in this instance. Here we are
putting in our constraints for both the providers are using as well as Terraform itself.
terraform {
  required_version = ">= 1.0"

  required_providers {
    azurerm = {
      source  = "hashicorp/azurerm"
      version = "~> 2.0"
    }
    tls = {
      source  = "hashicorp/tls"
      version = "~> 3.0"
    }
  }
}
Variables#
We define all our input variables inside the variables.tf, these are then consumed by our
Terraform code in main.tf.
variable "location" {
  type        = string
  description = <<-EOF
    (Optional) The Azure location to create the resources

    [Default: australiaeast]
  EOF
  default     = "australiaeast"
}

variable "environment" {
  type        = string
  description = <<-EOF
        (Optional) The environment where the resources will be created, as an acronym.
        Possible values:
            - "dev"
            - "stage"
            - "prod"

    [Default: dev]
  EOF
  default     = "dev"

  validation {
    condition     = can(regex("dev|stage|prod", var.environment))
    error_message = "This must be an acronym of the environment."
  }
}

variable "project" {
  type        = string
  description = "(Required) The project name"
}

variable "network_range" {
  type        = string
  description = "(Optional) The network range to use for the virtual network"
  default     = "10.0.0.0/24"
}

variable "runner_size" {
  type        = string
  description = "(Optional) The size of the runner VM"
  default     = "Standard_DS1_v2"
}

variable "image_urn" {
  type        = string
  description = "(Optional) The image URN to use for the runner VM"
  default     = "Canonical:UbuntuServer:18.04-LTS:latest"
}

variable "runner_token" {
  type        = string
  description = "(Required) The Github actions self-hosted runner registration token"
}

variable "runner_version" {
  type        = string
  description = "(Optional) The version of the runner to use"
  default     = "2.280.3"
}

variable "runner_group_name" {
  type        = string
  description = "(Required) The name of the group to use for the runner"
}

variable "github_organisation" {
  type        = string
  description = "(Required) The Github organisation to use"
}
As can be seen in the code above we are putting some default values in for some variables, this
will help reduce the interface when this Terraform code is either used or potentially used as a
module.
I have added in some validation on the environment variable to ensure that we control the name
and length of the environment name itself.
When you have more complex variables, or defaulted values I find it extremely useful to have longer description through the use of heredocs.
Main#
For the main.tf instead of just dumping the entire file and talking through it at the end I will
go through it piece by piece so that it's easier to understand.
The following locals block has two important sections:
- Prefix Name - This is used to help reduce the amount of formatting done within the code. There
is also a lookup for
locationto return a short name for the environment which is used as part of naming resources. - custom_data - This is the cloud-init data that does the actual installation of the Github runner agent and starts the service.
locals {
  location = {
    australiaeast = "aue"
  }
  suffix = format("%s-%s-%s",
    local.location[var.location],
    var.environment,
  var.project)

  custom_data = <<EOF
#cloud-config
runcmd:
- [mkdir, '/actions-runner']
- cd /actions-runner
- [curl, -o, 'actions-runner.tar.gz', -L, 'https://github.com/actions/runner/releases/download/v${var.runner_version}/actions-runner-linux-x64-${var.runner_version}.tar.gz']
- [tar, -xzf, 'actions-runner.tar.gz']
- [chmod, -R, 777, '/actions-runner']
- [su, runner-admin, -c, '/actions-runner/config.sh --url https://github.com/${var.github_organisation} --token ${var.runner_token} --runnergroup ${var.runner_group_name}']
- ./svc.sh install
- ./svc.sh start
- [rm, '/actions-runner/actions-runner.tar.gz']
EOF
}
Now that we have our dependencies available to us through the locals we now need to build out the
basic Azure components.
- azurerm_resource_group - This is the resource group where the resources will be deployed.
- azurerm_storage_account - This is the storage account where the boot diagnostics logs will be stored from our IaaS instance.
- tls_private_key - The key that we will use to authenticate to our GHAR.
resource "azurerm_resource_group" "this" {
  name     = format("rg-%s", local.suffix)
  location = var.location
}

resource "azurerm_storage_account" "this" {
  name                     = format("sa%s", replace(local.suffix, "-", ""))
  resource_group_name      = azurerm_resource_group.this.name
  location                 = azurerm_resource_group.this.location
  account_tier             = "Standard"
  account_replication_type = "LRS"
}

resource "tls_private_key" "this" {
  algorithm = "RSA"
  rsa_bits  = 2048
}
The next cab off the rank will be the networking stack.
- azurerm_virtual_network - Network where our GHARs will be connected to.
- azurerm_subnet - Subnet where our GHARs will be connected to.
- azurerm_network_interface - The network interface that will be used by the IaaS instance, and it will lie in the defined subnet.
resource "azurerm_virtual_network" "this" {
  name                = format("vn-%s", local.suffix)
  resource_group_name = azurerm_resource_group.this.name
  location            = azurerm_resource_group.this.location

  address_space = [var.network_range]
}

resource "azurerm_subnet" "runners" {
  name                 = format("sn-%s", local.suffix)
  resource_group_name  = azurerm_resource_group.this.name
  virtual_network_name = azurerm_virtual_network.this.name

  address_prefixes = [cidrsubnet(var.network_range, 0, 0)]
}

resource "azurerm_network_interface" "this" {
  name                = format("ni-%s", local.suffix)
  resource_group_name = azurerm_resource_group.this.name
  location            = azurerm_resource_group.this.location

  ip_configuration {
    name                          = "internal"
    subnet_id                     = azurerm_subnet.runners.id
    private_ip_address_allocation = "Dynamic"
  }
}
The last piece of the puzzle is the IaaS instance itself.
- azurerm_linux_virtual_machine - The IaaS instance that will be used to run the Github Actions runner.
resource "azurerm_linux_virtual_machine" "runners" {
  name                            = replace(format("vm-%s", local.suffix), "-", "")
  resource_group_name             = azurerm_resource_group.this.name
  location                        = azurerm_resource_group.this.location
  size                            = var.runner_size
  admin_username                  = "runner-admin"
  network_interface_ids           = [azurerm_network_interface.this.id]

  admin_ssh_key {
    username   = "runner-admin"
    public_key = tls_private_key.this.public_key_openssh
  }

  os_disk {
    caching              = "None"
    storage_account_type = "Standard_LRS"
  }

  source_image_reference {
    publisher = split(":", var.image_urn)[0]
    offer     = split(":", var.image_urn)[1]
    sku       = split(":", var.image_urn)[2]
    version   = split(":", var.image_urn)[3]
  }

  boot_diagnostics {
    storage_account_uri = azurerm_storage_account.this.primary_blob_endpoint
  }

  custom_data = base64encode(local.custom_data)
}
The custom_data attribute MUST be base64 encoded in order for the Azure instance to be able to
access it. Luckily Terraform has a base64encode function that will do this for us.
Deployment#
Now that we have all our code written, and the runner group has been created we can deploy the runner!
As is standard with Terraform the deployment is a three step process.
- Init - where the providers and any modules are downloaded and initialized for use, as well as any configured backends.
- Plan - where we can see what resources are going to be created, changed, or destroyed.
- Apply - where the resource modifications are actually done.
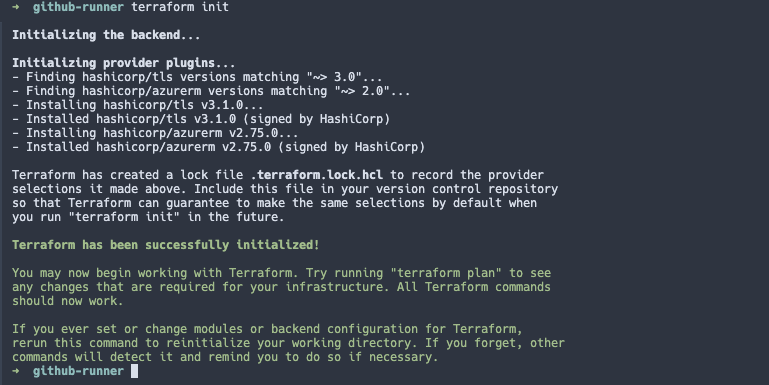
- First off lets run the
init:
terraform init
As can be seen in the below screenshot Terraform is downloading the two providers we are consuming.
- Secondly, the plan:
terraform plan \
-var="project=mom" \
-var="runner_token=XXX" \
-var="runner_group_name=hogwarts-houses" \
-var="github_organisation=the-ministry-of-magic"
The above will output a plan showing what resources will be created, changed, or destroyed. I won't show that here as it is rather long.
- Finally, the apply:
terraform apply \
-var="project=mom" \
-var="runner_token=XXX" \
-var="runner_group_name=hogwarts-houses" \
-var="github_organisation=the-ministry-of-magic" \
-auto-approve
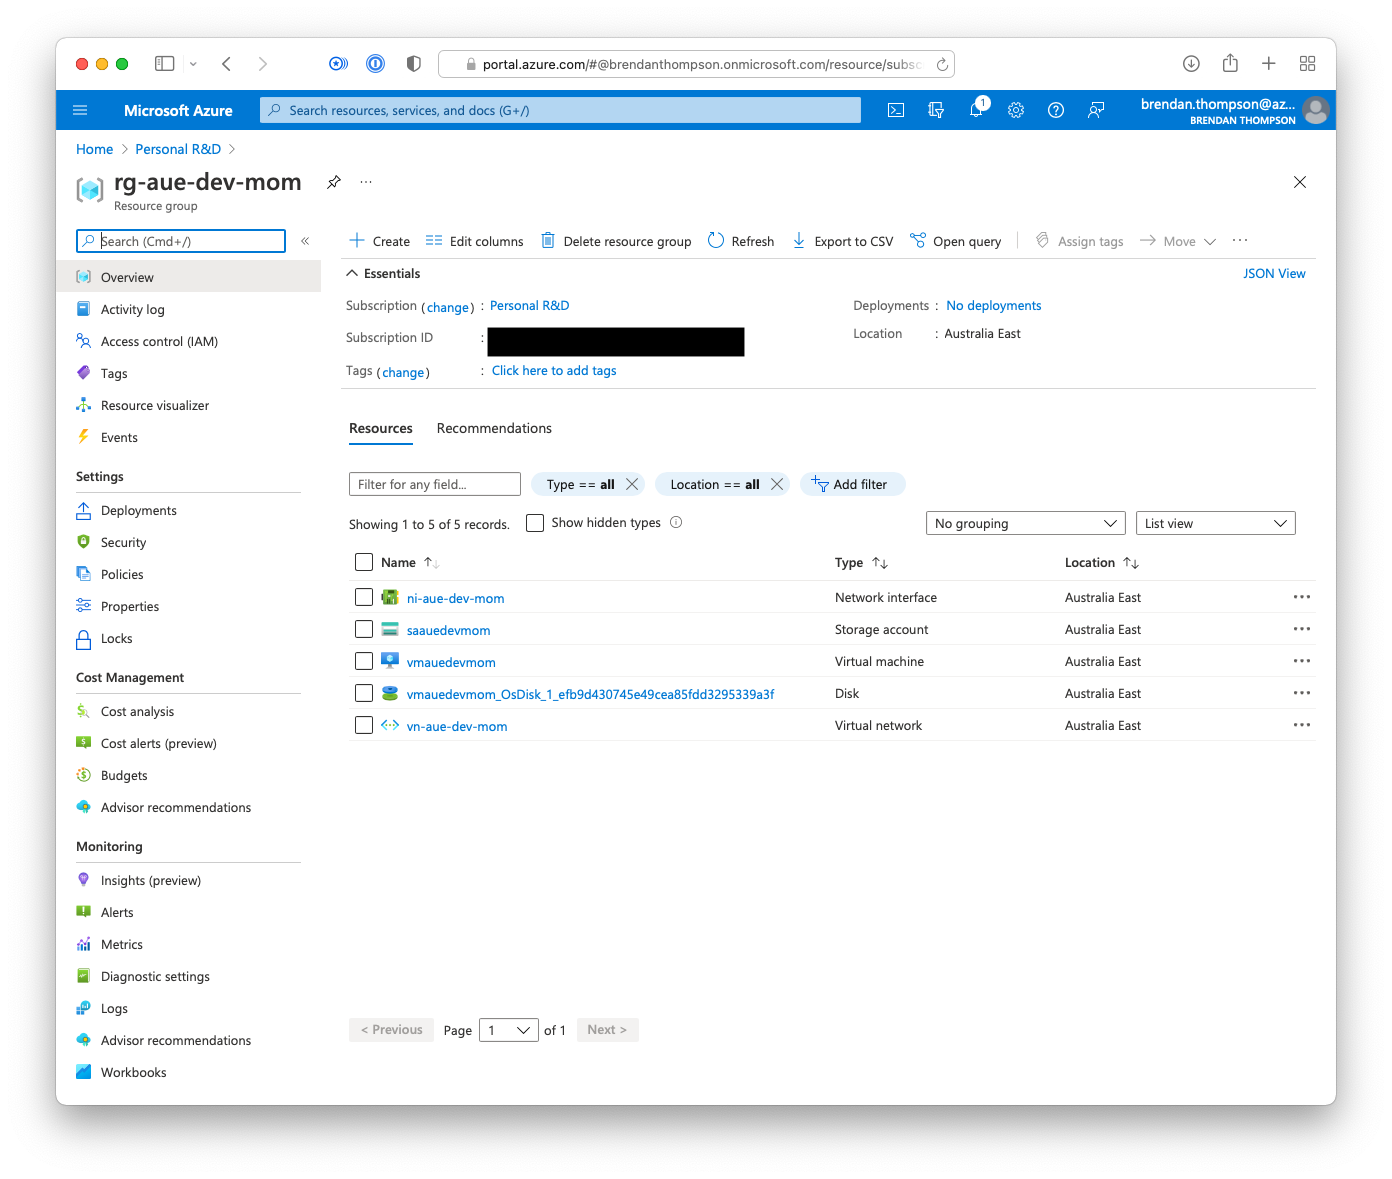
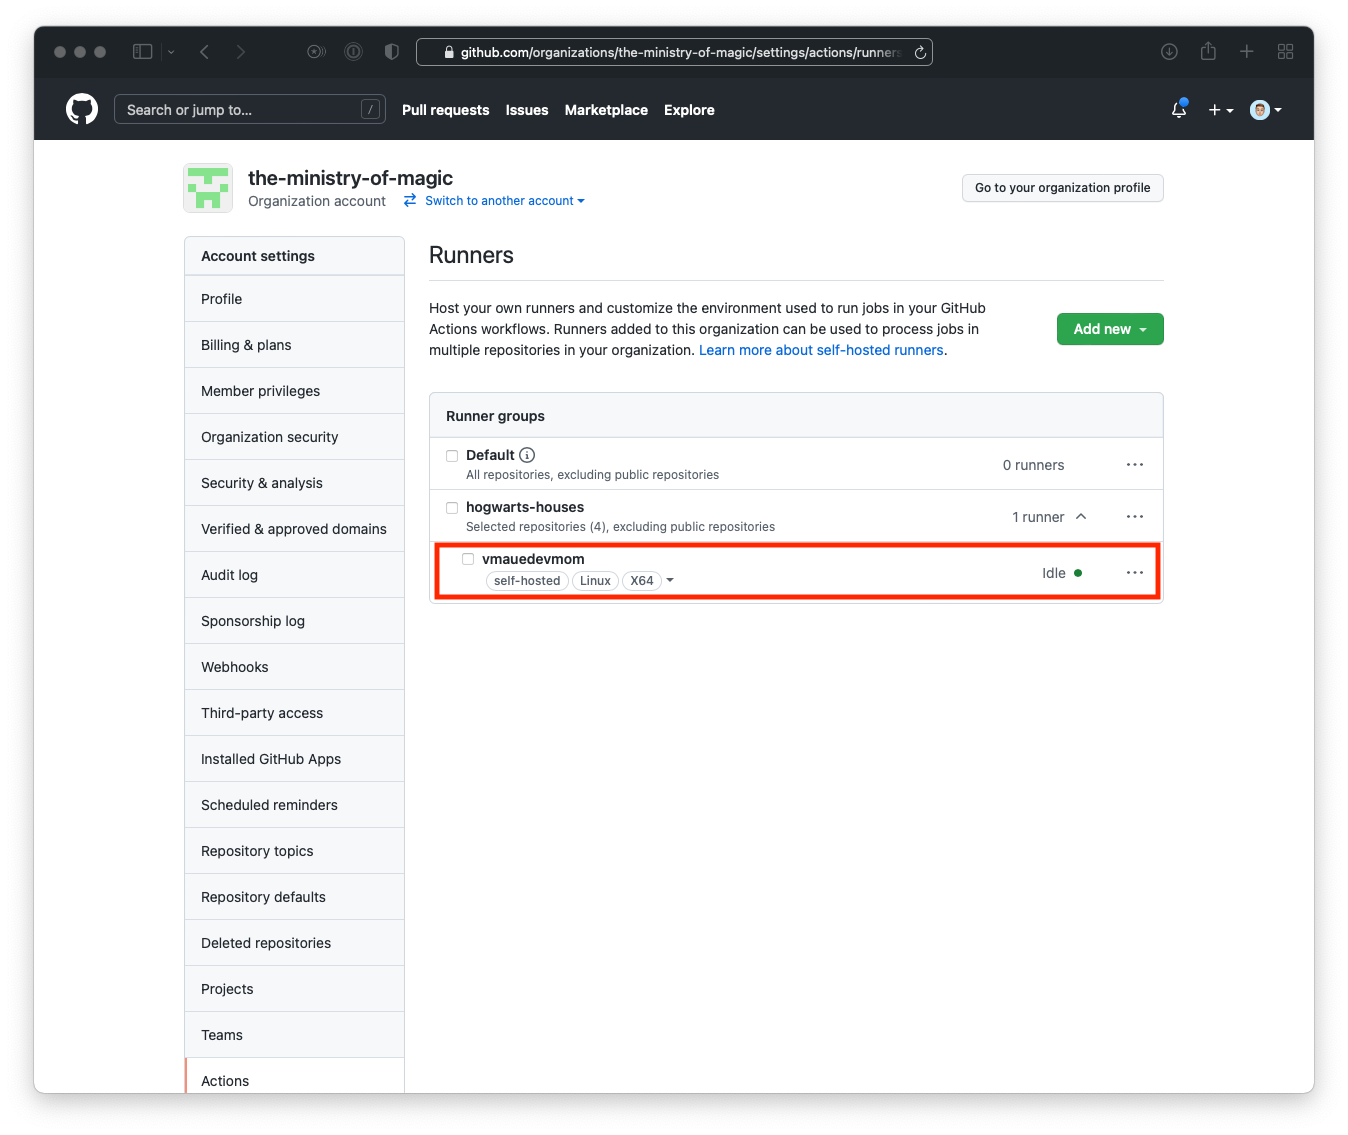
As can be seen in the below screenshot we have a new Github Actions runner!
Further, if we go and look in the Azure portal we can see all the resources we declared in our Terraform code.