CoreDNS on macOS for Local Development
Brendan Thompson • 21 December 2021 • 4 min read
Over the years, I have tried a few different ways of managing DNS on my local laptop, sometimes with
dnsmasq sometimes just with hosts file, and other times using public DNS. CoreDNS seems
to be all the rage these days (as it should be), so I thought I would give that a try.
There are a few guides out there on how to configure CoreDNS with Docker or on your Kubernetes, but I was interested in running it all locally on my Mac.
Prerequisites#
Installation & Setup#
First off we let's install CoreDNS on our Mac
brew install corednsStart the CoreDNS service
sudo brew services start corednsCreate a zone file for the DNS zone we want to use locally; this can be called anything
 $ORIGIN local.blt.is.
 $TTL 1h

 @                 IN  SOA     ns.local.blt.is. admin.local.blt.is. (
                                   2020010510     ; Serial
                                   1d             ; Refresh
                                   2h             ; Retry
                                   4w             ; Expire
                                   1h)            ; Minimum TTL
 @                 IN  A       127.0.0.1
 @                 IN  NS      ns.local.blt.is.
 ns                IN  CNAME   @
This file contains the domain (or subdomain) that we want to use and a declaration of a name server record pointing to itself, this file uses resource records. It is worth reading up on the RDATA format required for SOA records, which you can do here.
The following file we will create is the
Corefile; this is where the magic happens. { forward . 8.8.8.8 9.9.9.9 log errors } local.blt.is { file /Users/brendanthompson/.config/coredns/local.blt.is log errors }Our file here is split into two server blocks, the first one
.will match any DNS queries that do not match any domains listed in other server blocks. The second server block contains the domainlocal.blt.isand will parse through our zone file with thefileplugin.InformationBy default Homebrew will place theCorefilein the below directory:/opt/homebrew/etc/coredns/Corefile
Finally, we need to restart our CoreDNS service to see the results
sudo brew services restart corednsSet our network interface to use our freshly minted DNS server
- With the command-line
networksetup -setdnsservers Wi-Fi 127.0.0.1 - Using the GUI with the Network pane in System Preferences
- Select the network interface on the left-hand pane, and click on the Advanced button
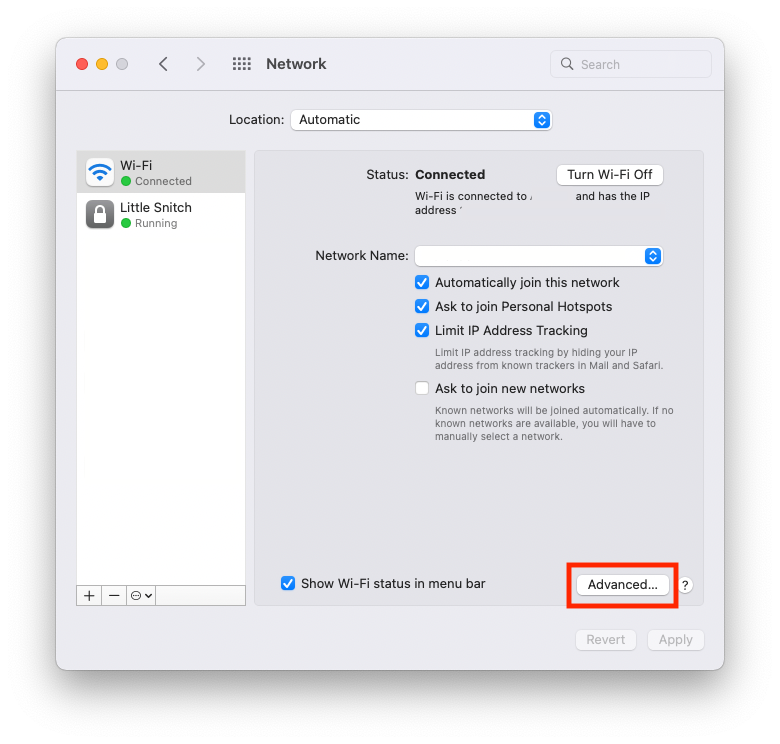
- Select the DNS tab
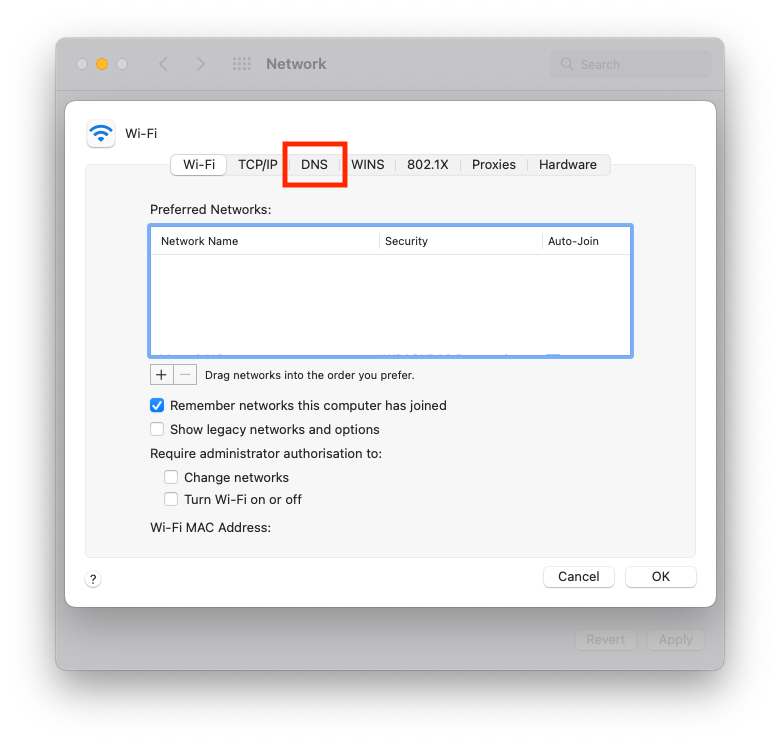
- Add
127.0.0.1into the DNS Servers list on the left and click OK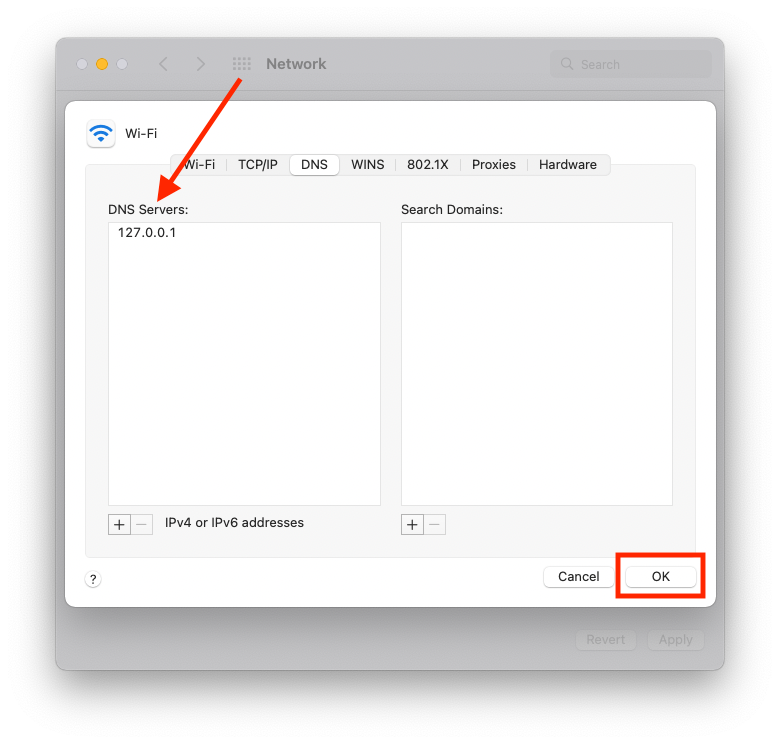
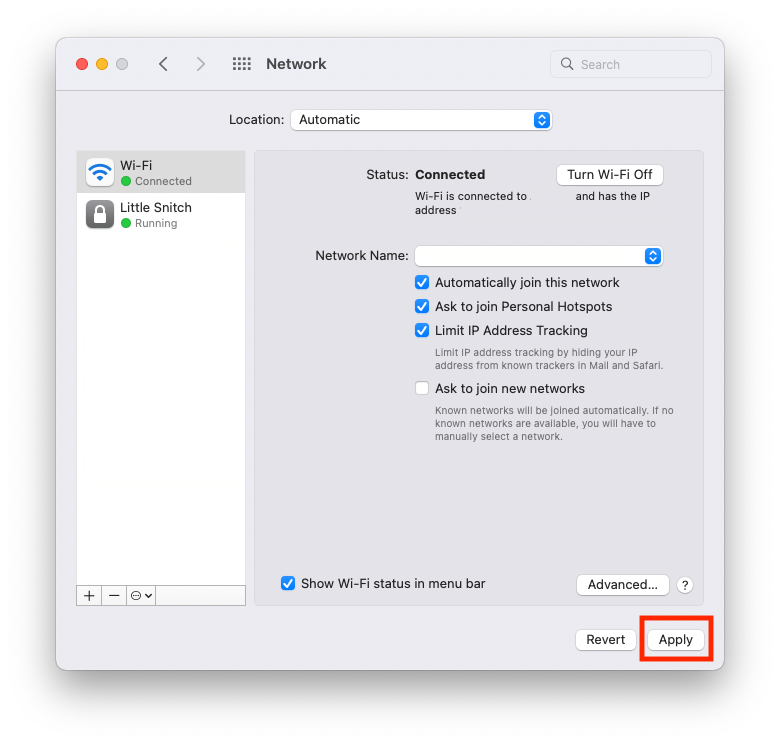
- Click Apply
- Select the network interface on the left-hand pane, and click on the Advanced button
- With the command-line
Now that we have completed our setup, let's validate our configuration to ensure when we hit
local.blt.is, it will resolve on our local DNS server. The followingdigcommand can be used to check our DNS configurationbash dig local.blt.isIf setup correct it will return the following:
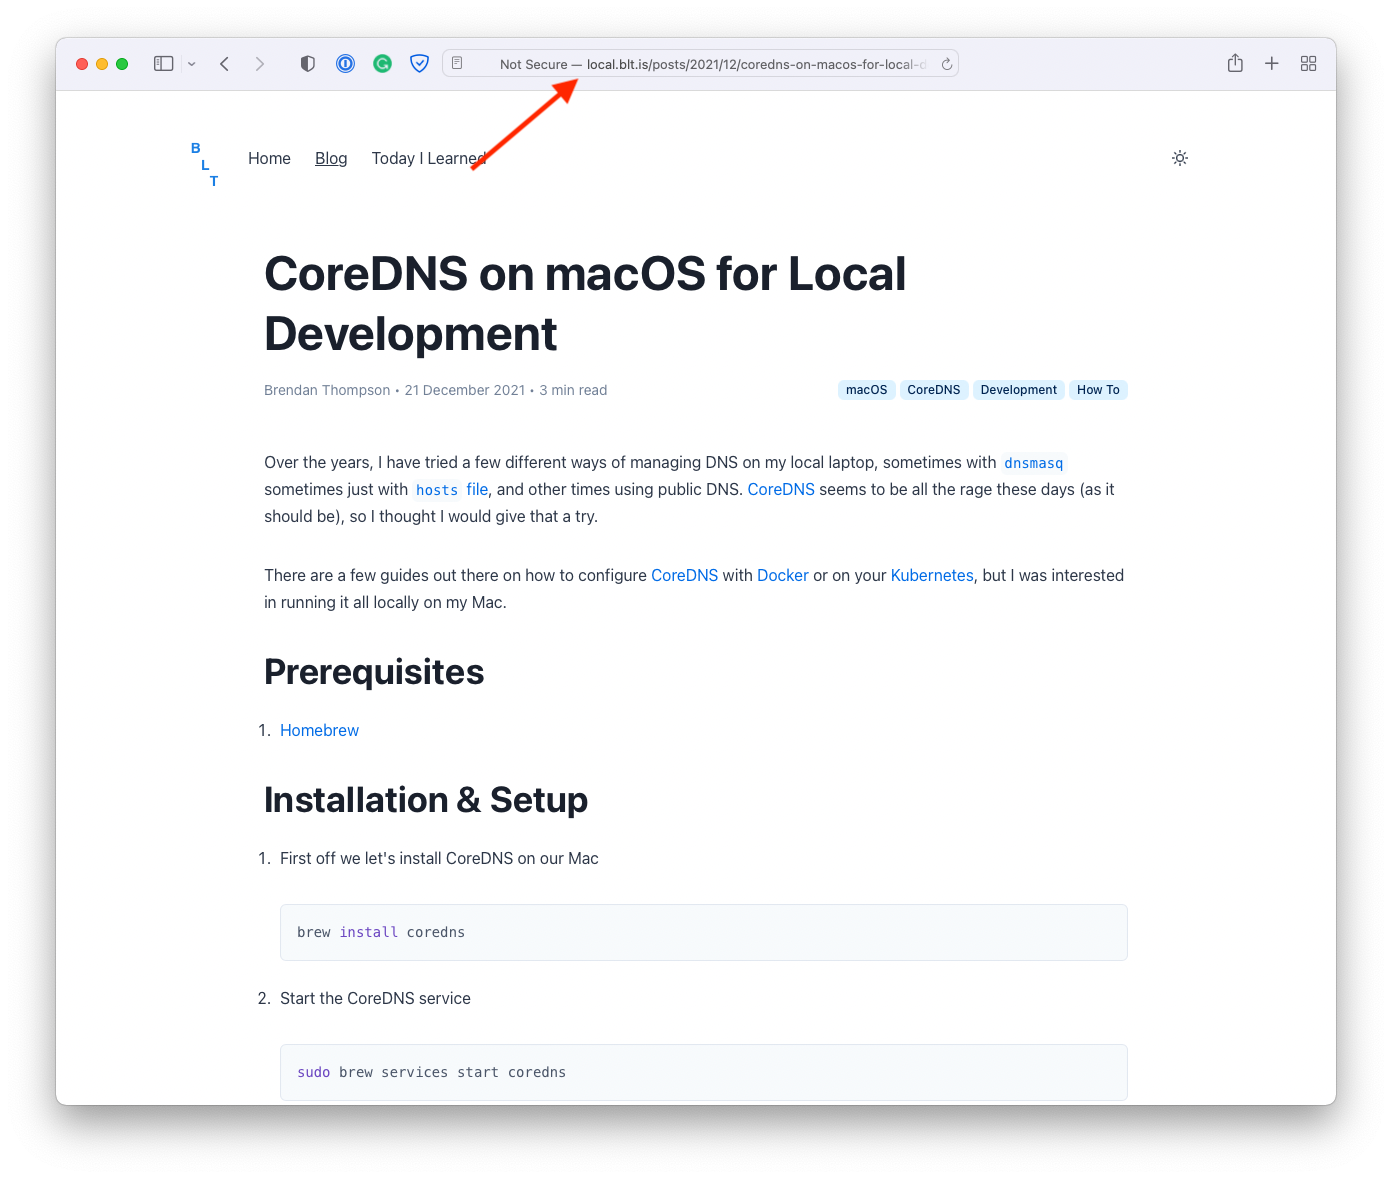
; <<>> DiG 9.10.6 <<>> local.blt.is
;; global options: +cmd
;; Got answer:
;; ->>HEADER<<- opcode: QUERY, status: NOERROR, id: 20882
;; flags: qr aa rd; QUERY: 1, ANSWER: 1, AUTHORITY: 1, ADDITIONAL: 1
;; WARNING: recursion requested but not available

;; OPT PSEUDOSECTION:
; EDNS: version: 0, flags:; udp: 4096
;; QUESTION SECTION:
;local.blt.is.          IN  A

;; ANSWER SECTION:
local.blt.is.       3600    IN  A   127.0.0.1

;; AUTHORITY SECTION:
local.blt.is.       3600    IN  NS  ns.local.blt.is.

;; Query time: 4 msec
;; SERVER: 127.0.0.1#53(127.0.0.1)
;; WHEN: Tue Dec 21 10:09:04 AEDT 2021
;; MSG SIZE  rcvd: 110
Further to this, we can see when using Safari that this blog post renders using our local address:
Closing Out#
Setting up local.blt.is to resolve using local DNS with CoreDNS mainly was just an experiment
to see if it was possible to do. I am unsure if I will keep this running long term, but I am keen
to continue playing around to see what value I can get out of running this locally.