Using GitHub Actions to publish container images to Azure Container Registry
Brendan Thompson • 11 February 2022 • 7 min read
Introduction#
As containers continue to explode in popularity, we need to understand how to build the containers from their manifest and push them into a registry so that our users can consume them! GitHub Actions (GHA) is an excellent choice for this process, especially if you're already storing your code on GitHub. As these days I tend to be more focused on Azure we will be using the Azure Container Registry (ACR) for the post today.
The Dockerfile#
Now that we know what we're going to look at today let's kick on!
Below I have a very simple Dockerfile that will build a go binary with a version number
that is passed into the process, and then output a scratch container with our go binary in it.
FROM golang:alpine AS builder

ARG version

RUN apk update && \
    apk add --no-cache git

WORKDIR /app

COPY . .

RUN go mod download && \
    CGO_ENABLED=0 go build -ldflags="-X main.Version=${version}" -o departments-api

FROM scratch

COPY --from=builder /app/departments-api /

ENTRYPOINT [ "/departments-api" ]
Setting up Secrets#
Before we create our GH workflow, we will want to set up the secrets; this process is straightforward. Make sure you have your ACR credentials on hand for this part!
Click on the Settings tab in your repository

On the left-hand menu, click the Secrets menu item
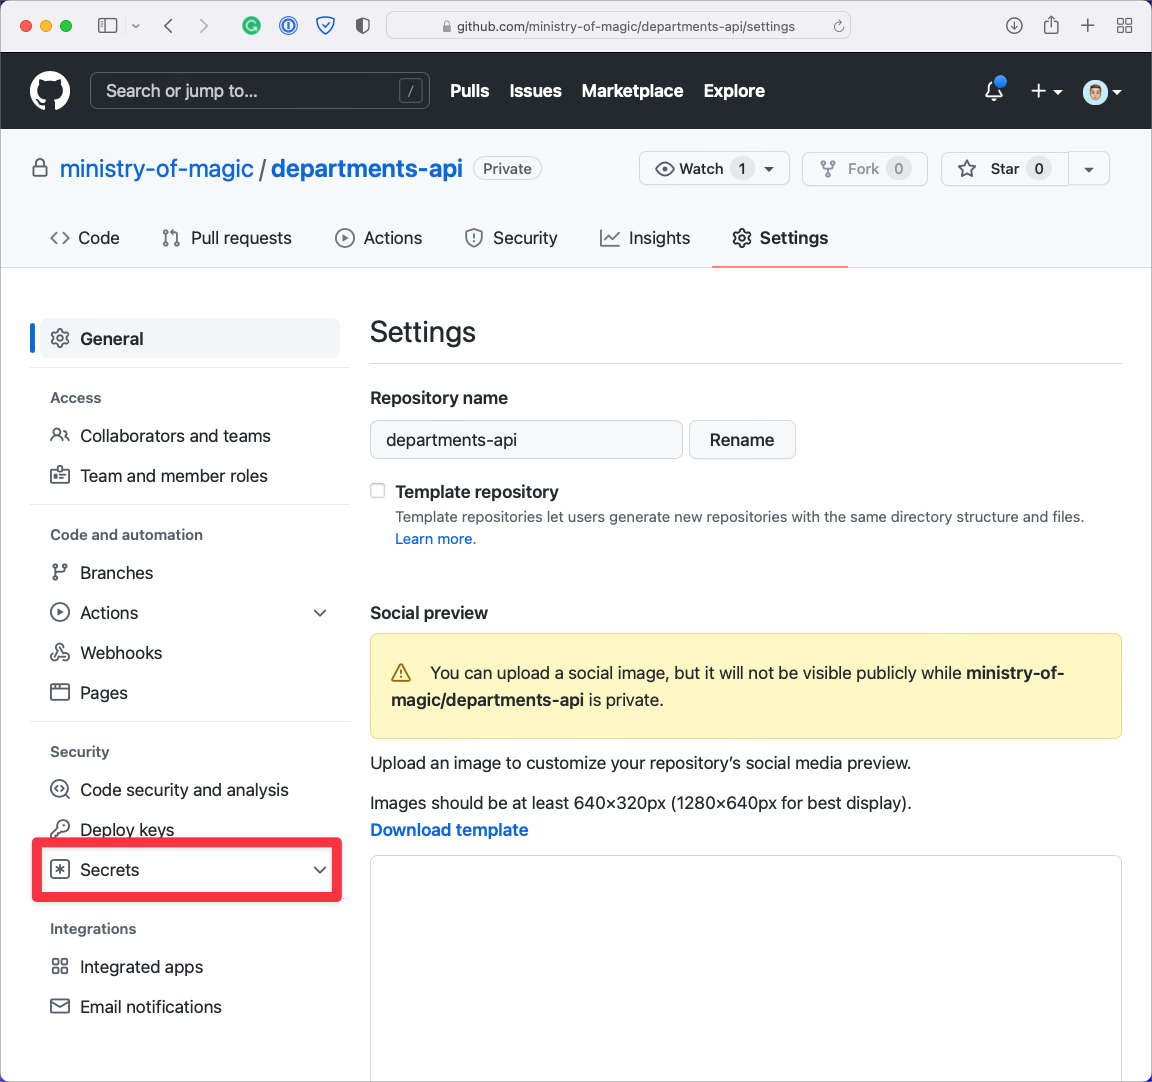
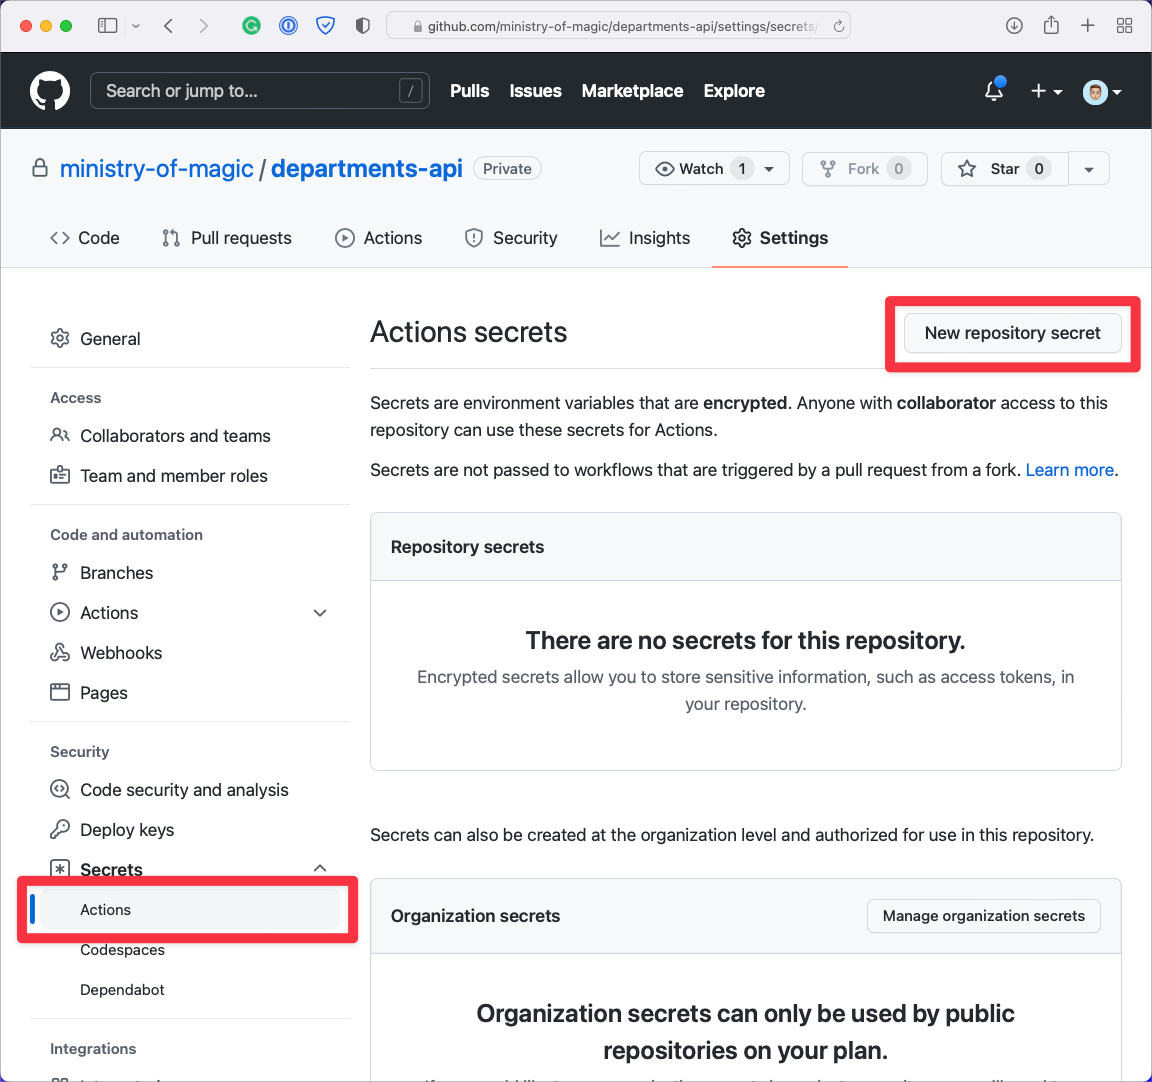
Click on Actions that sits under Secrets, and then click New Repository Secret
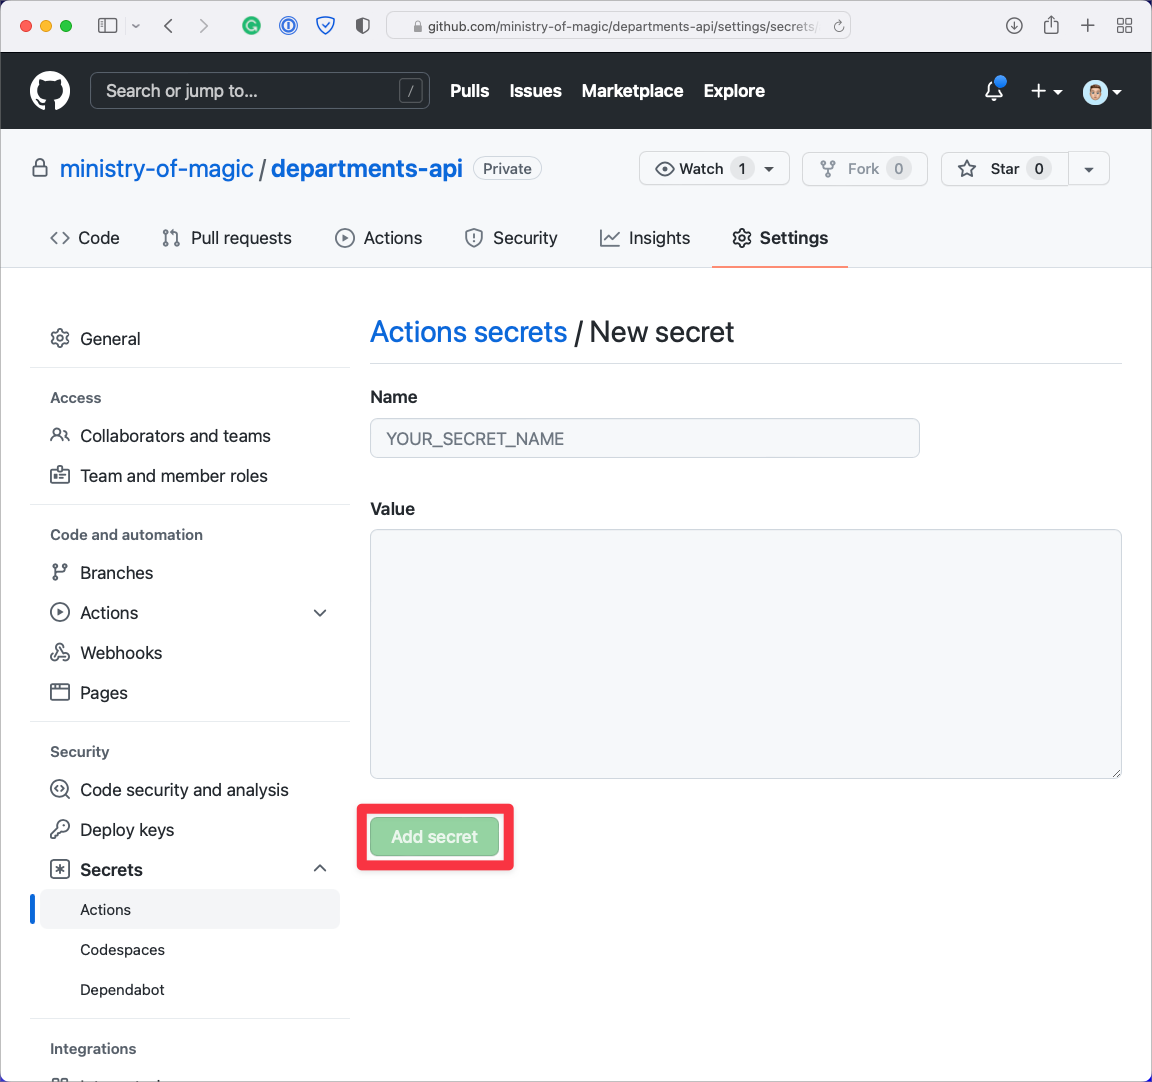
Add in the name and then the value of your secret, and click Add Secret
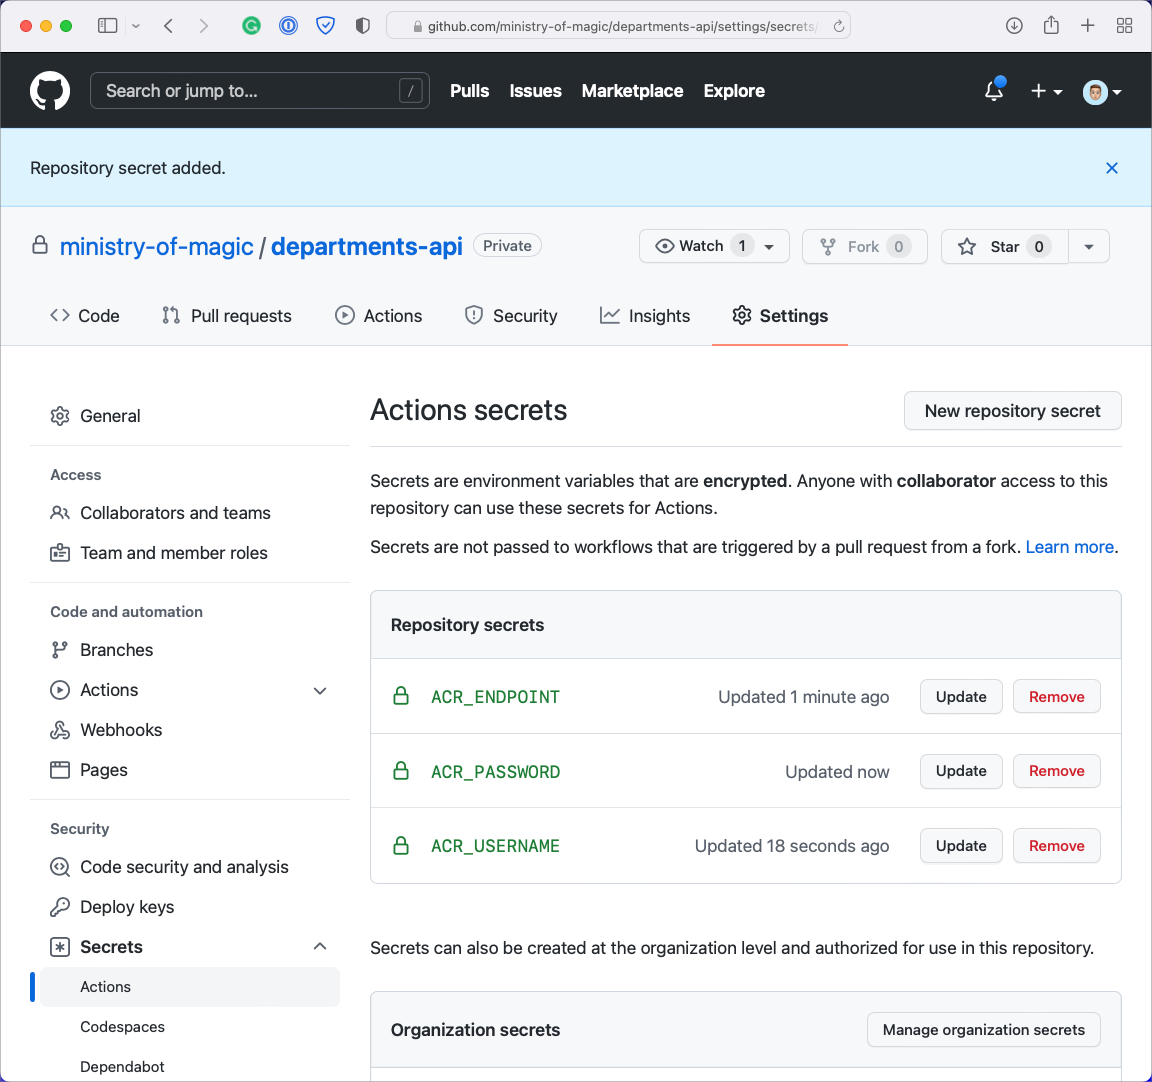
This step will need to be completed three times for the following secrets;
ACR_ENDPOINT,ACR_USERNAME, andACR_PASSWORD.Once the secrets are all in place you should see them back on the Actions secrets page
The workflow#
Before we can set up the workflow, we need to ensure that the right directories exist within our repository for GitHub to pick up the workflow files. The first cab off the rank is to create those directories with the below command:
mkdir -p .github/workflows
Now that our directories exist let's construct the workflow and put it in the workflows directory.
I will go through the workflow file piece by piece and then show it all together at the end.
The workflow's name will be shown within the GitHub UI.
name: Dockeroninstructs GitHub Actions when to trigger the workflow; in this instance, we will be triggering any time that there is a tag pushed to the repository.on: push: tags: ['v*.*.*']Any environment variables that we need to declare will be done here under the
envkey.env: IMAGE_NAME: departments-apiWorkflows can have one or more
jobsto perform the required actions to fulfil our workflow's build and/or deployment. We will be using a singlejobwith multiplesteps. Thejoband subsequentbuildwe have declared below will name our workflowjoband instruct GHA on which agent it will run.jobs: build: name: Build container image runs-on: ubuntu-latestThe first
stepof ourjobis to checkout the code from our repository; we do that with theactions/checkout@v2action.steps: - name: Checkout repository uses: actions/checkout@v2Once our code is present within the working directory of the build agent, we need to retrieve the tag from our code.
steps: - name: Get tag id: tag uses: dawidd6/action-get-tag@v1The next step is logging into our ACR with the credentials we put into GitHub secrets.
steps: - name: Log into registry uses: docker/login-action@v1 with: registry: ${{ secrets.ACR_ENDPOINT }} username: ${{ secrets.ACR_USERNAME }} password: ${{ secrets.ACR_PASSWORD }}The final step is to build the container image and then push it to the ACR instance. The version number from the Get tag step gets passed through build arguments into the Docker build process. Finally, we setup the image tag; this is based on the endpoint for ACR, the name of the image and the tags.
steps: - name: Build & Push uses: docker/build-push-action@v2 with: push: true build-args: | version=${{ steps.tag.outputs.tag }} tags: ${{ secrets.ACR_ENDPOINT }}/${{ env.IMAGE_NAME }}:${{ steps.tag.outputs.tag }}
Now that we have seen all the components individually, I have composed that as a complete
workflow file below. You might notice that there is only a single steps in the complete workflow
file. I opted to prefix each step above with the steps key to ensure you could easily see what
we were talking about; however, for the final file, there must only be one.
name: Docker
on:
push:
tags: ["v*.*.*"]
env:
  IMAGE_NAME: departments-api
jobs:
  build:
    name: Build container image
    runs-on: ubuntu-latest
steps:
  - name: Checkout repository
    uses: actions/checkout@v2
- name: Get tag
id: tag
uses: dawidd6/action-get-tag@v1
- name: Log into registry
uses: docker/login-action@v1
with:
registry: ${{ secrets.ACR_ENDPOINT }}
username: ${{ secrets.ACR_USERNAME }}
password: ${{ secrets.ACR_PASSWORD }}
- name: Build & Push
uses: docker/build-push-action@v2
with:
push: true
build-args: |
version=${{ steps.tag.outputs.tag }}
tags: ${{ secrets.ACR_ENDPOINT }}/${{ env.IMAGE_NAME }}:${{ steps.tag.outputs.tag }}
Running the build#
Now we have our Dockerfile, workflow file, and GitHub secrets in place, we can run the build!
Let's go through this step by step.
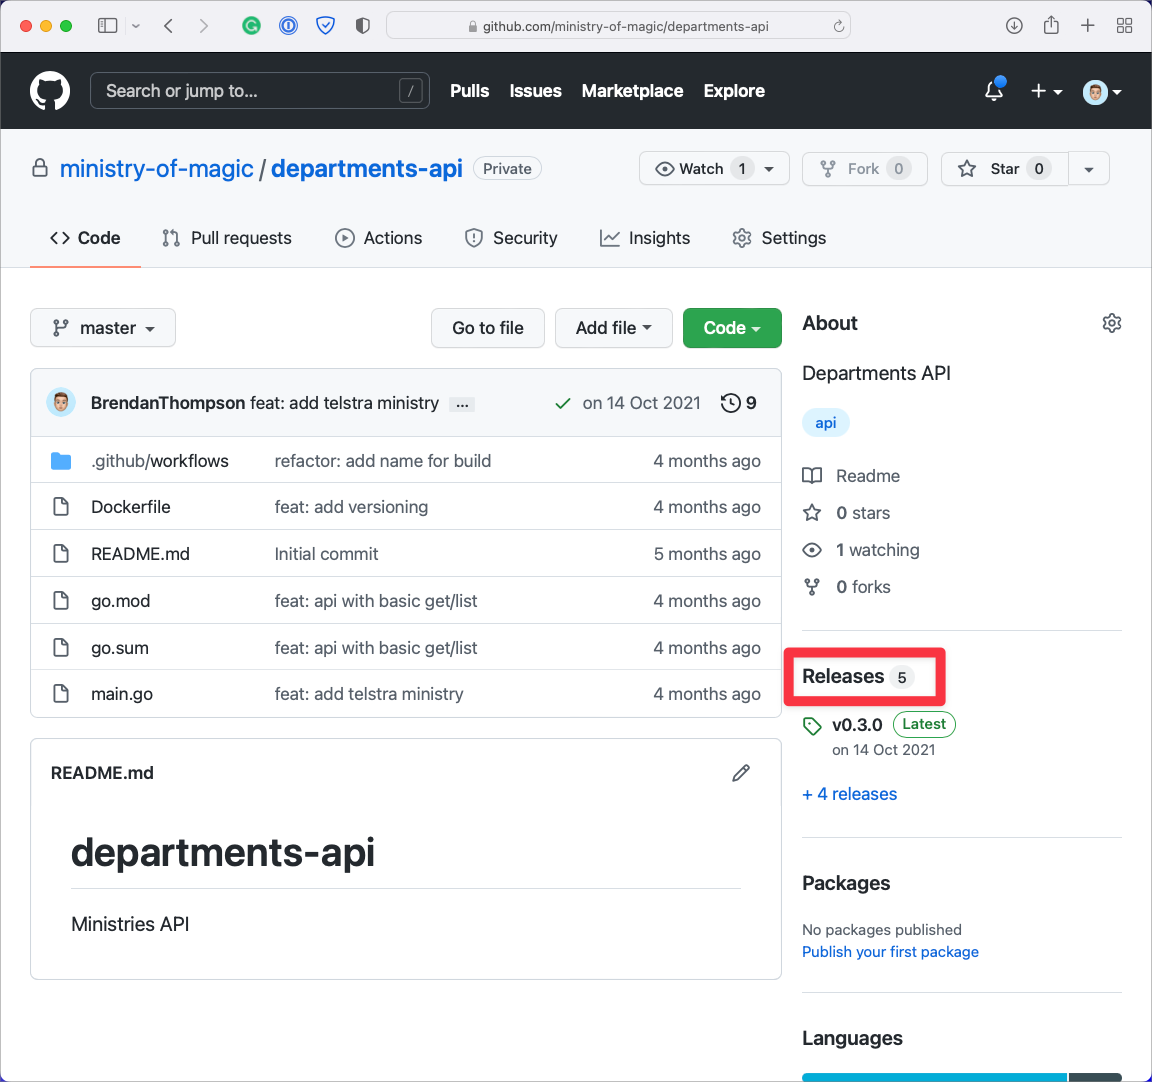
From the main page of the repository click on Releases on the right-hand side
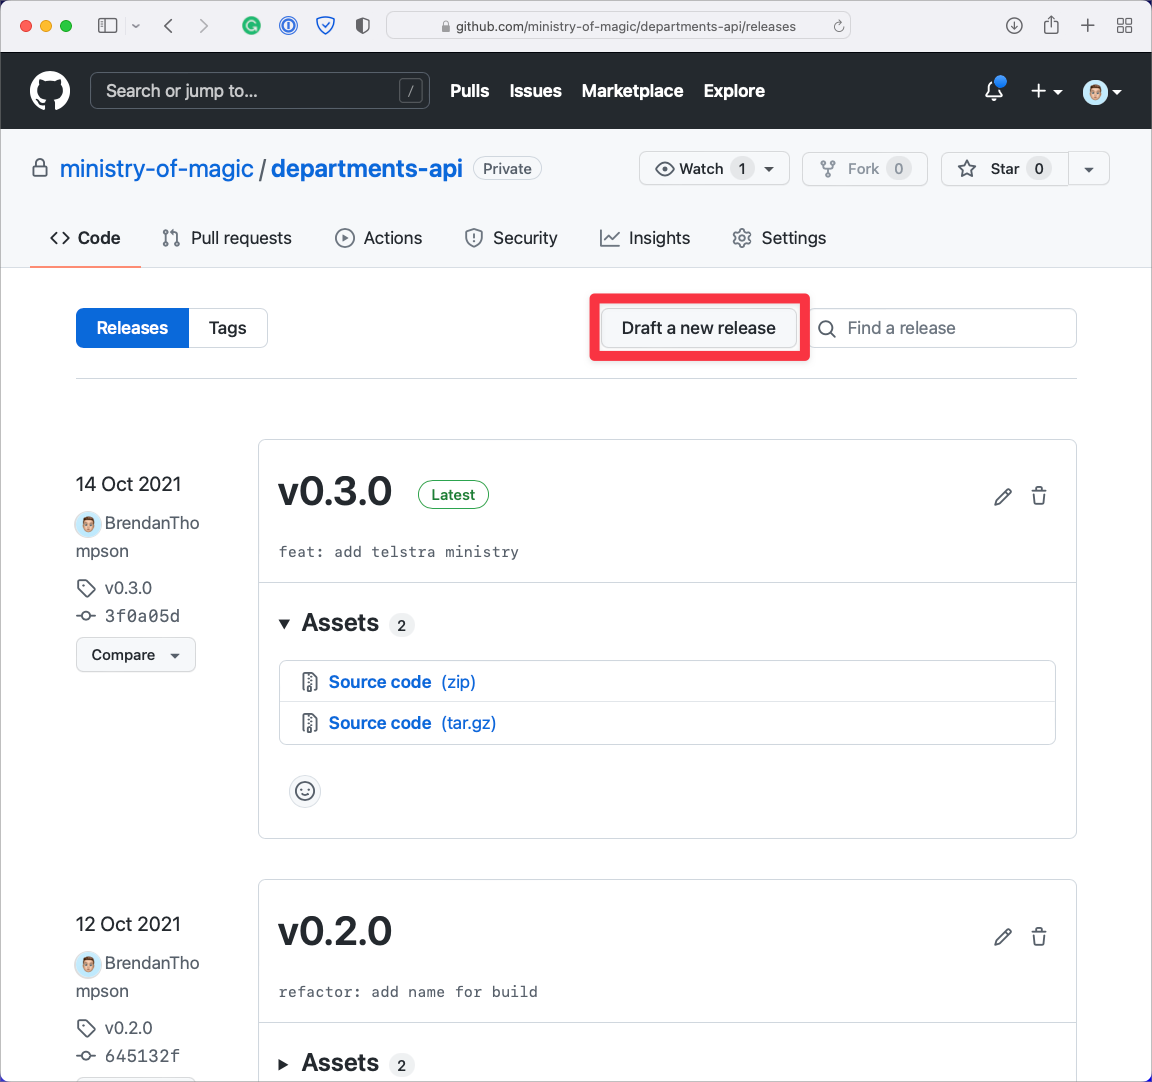
From the releases page we are next going to click on Draft new release
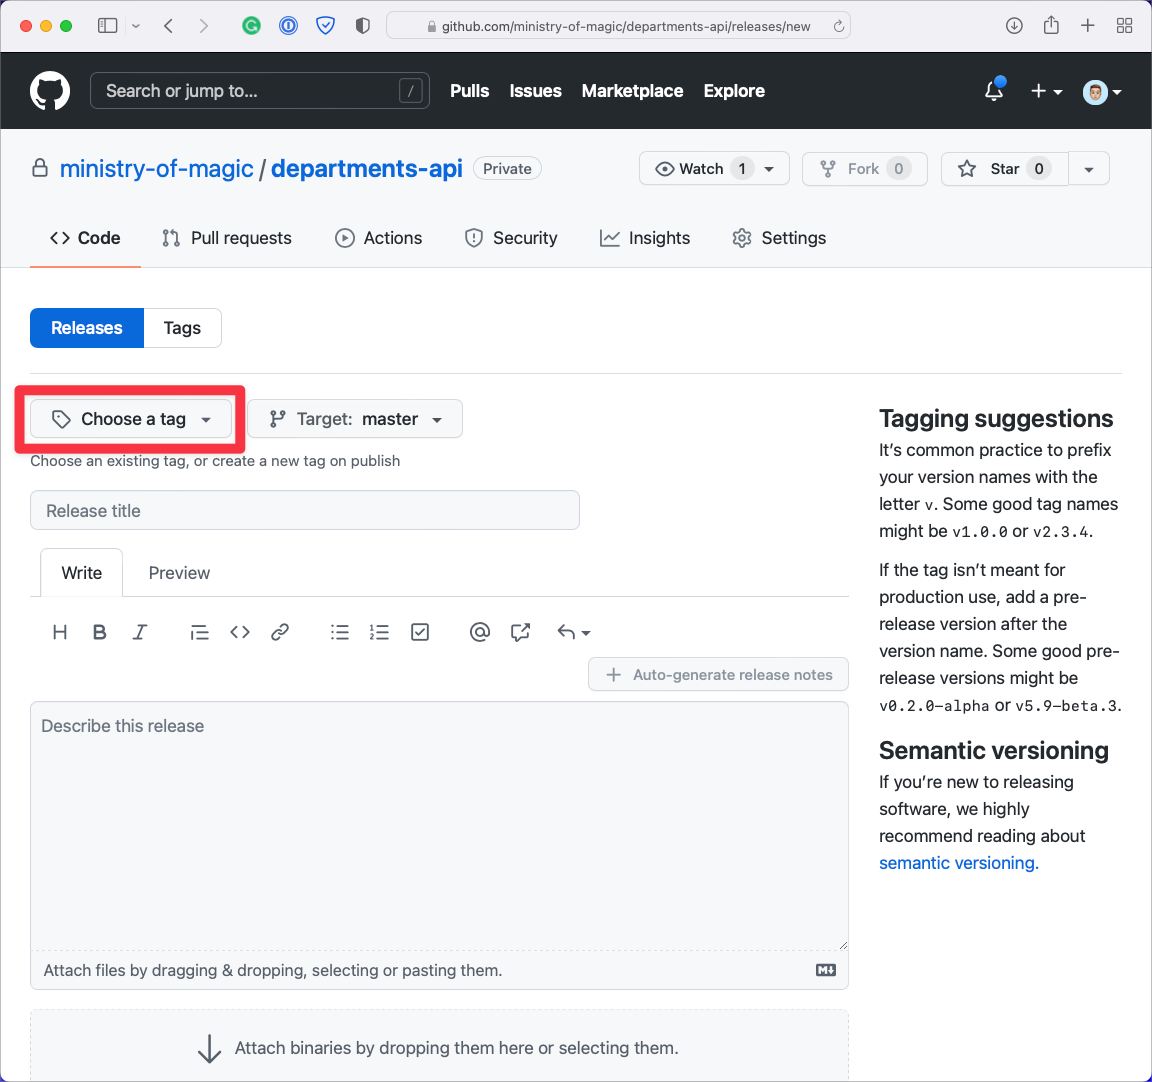
Click on the Choose a tag drop down
Enter the new git tag name from the drop-down and click on Create new tag. In this instance we are putting in
v0.4.0as our new git tag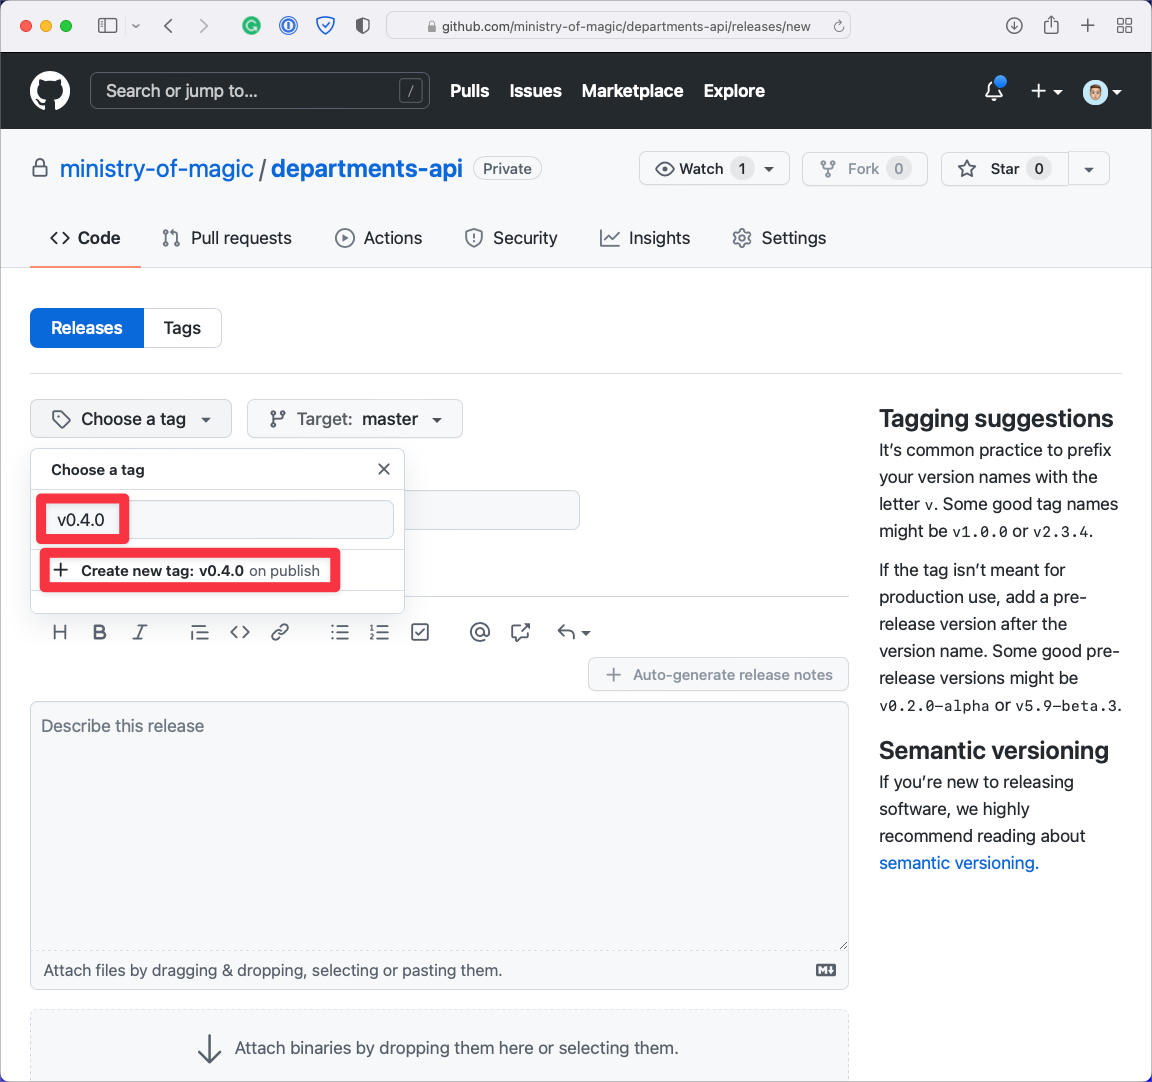
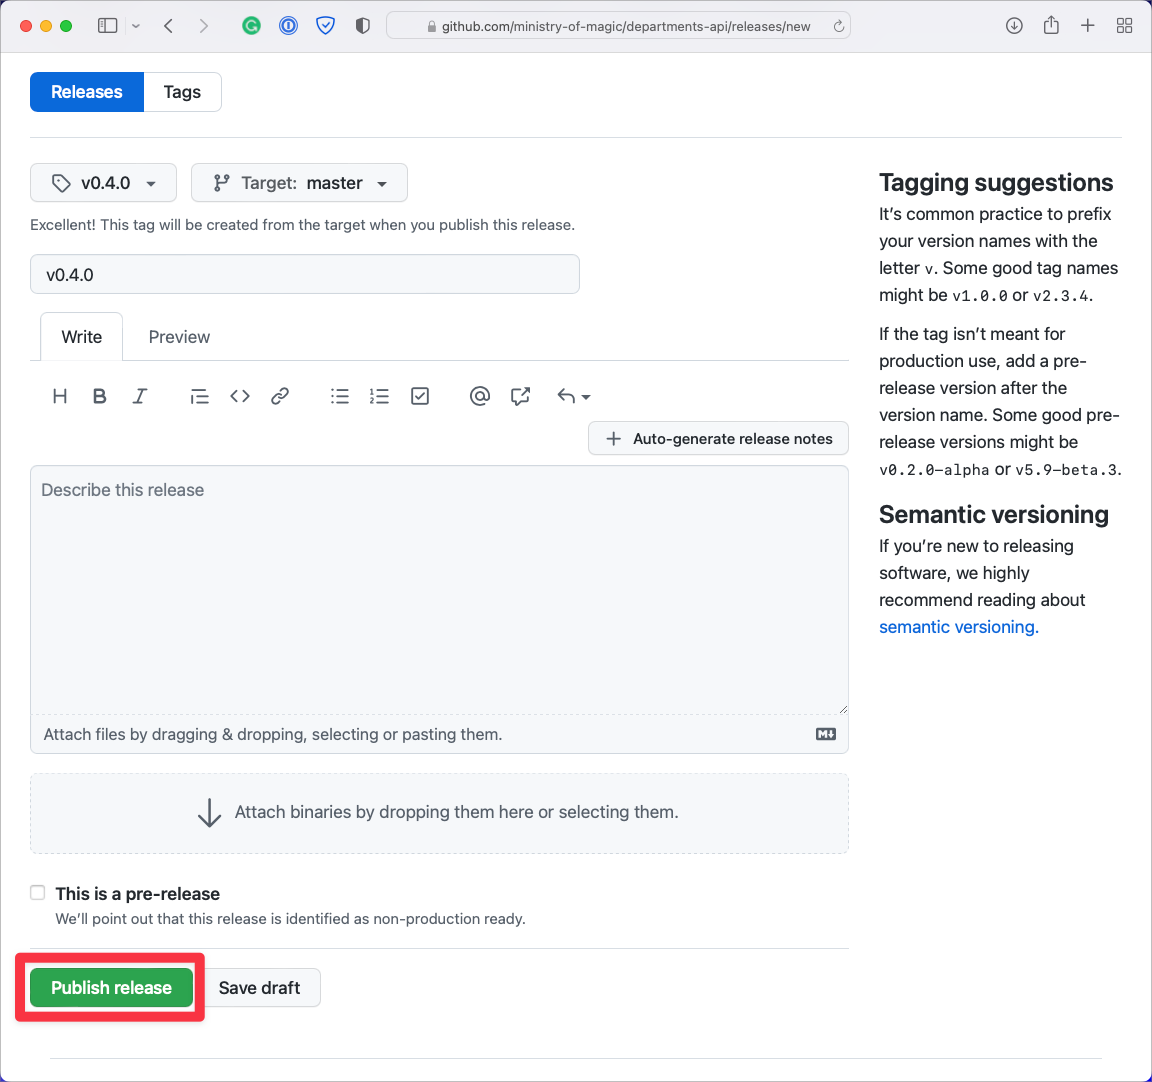
Now, we can put in a name for the GitHub release, which usually aligns to the git tag that we previously put in; the changelog should live in the release description. Finally, click on Publish release
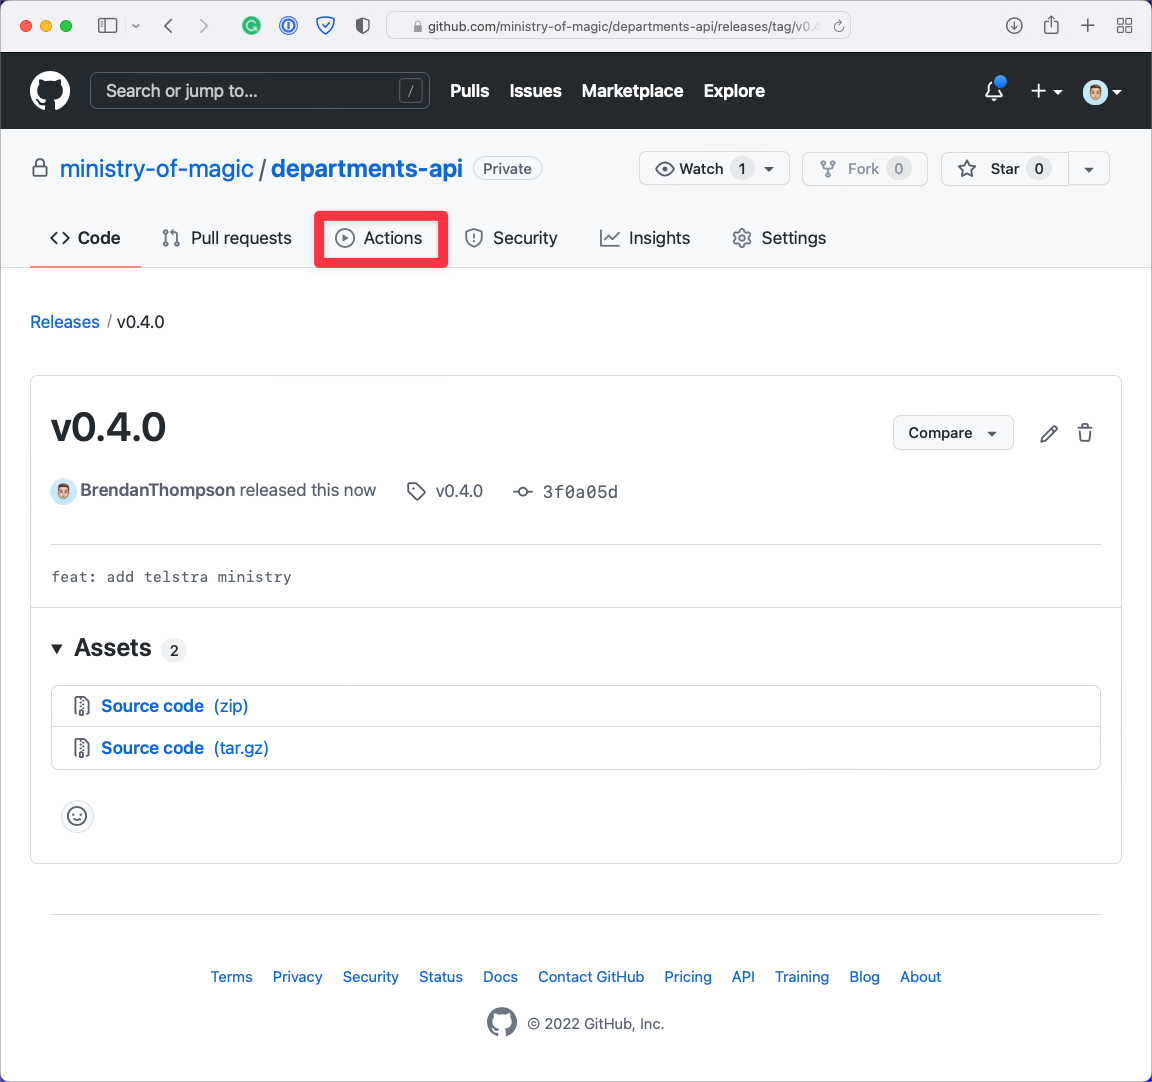
From the page of the release that you should now be on, we can click on Actions to go and view the status of our workflow run
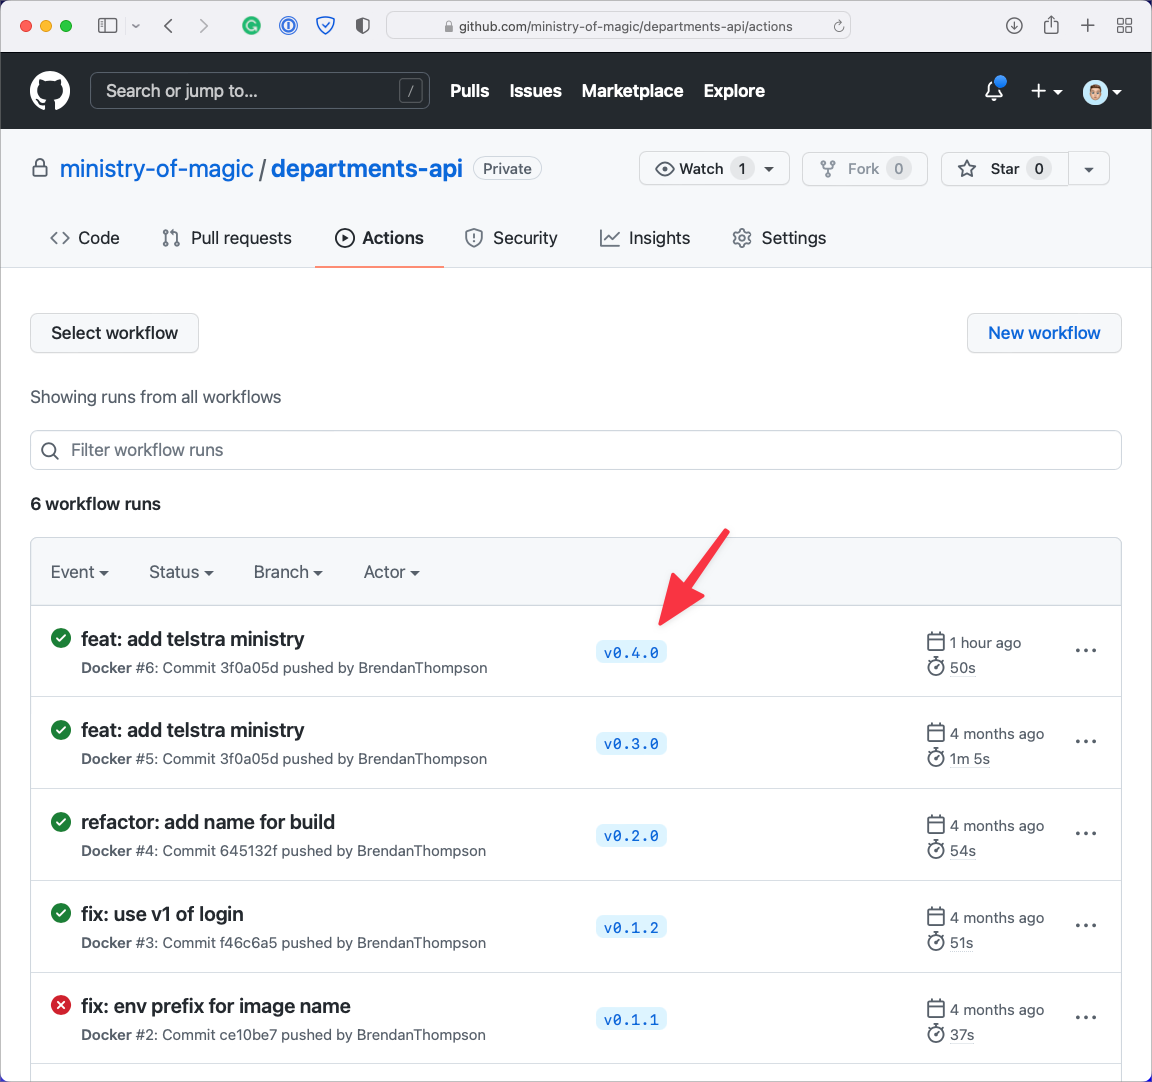
From the Actions page, we see that our workflow has run because we published a new version!
Closing out#
We have gone through today's post; creating our Dockerfile, setting up the secrets in GitHub,
setting up the workflow and the pre-requisites for workflows, and finally running the build. I would
say that the build and publish process with GitHub Actions is extremely clean and very easy to get
up and running. GitHub Actions is a real game-changer for CI/CD, and it is truly
exciting to see where it goes in the future!